Showing posts with label t-shirt. Show all posts

Monday, January 5, 2015

Shredded Heart T-shirt -- Sewing Tutorial


I know Valentine's Day is still a month away, but I couldn't resist making Charlotte (my six-year-old) a new shredded heart t-shirt to replace the one she has just about worn to death over the past two years.  My brother-in-law once asked Charlotte if she had been attacked by a vampire what she was wearing it, but she just giggled and ran away.  Let's hope no one else mistakes little Charlotte as a vampire's victim when she wears this new shirt.

The tutorial for this is so simple that I could probably just post a series of photos without text, but I have a few tips along the way that I learned after making a couple of these.  This is kind of a form of reverse appliqué, I suppose, but don't quote me on that.


Shredded Heart T-shirt -- Sewing Tutorial

Materials Needed:

Store-bought t-shirt, pre-washed
Shiny fabric (a light- to medium-weight scrap as big as the chest area of the shirt is plenty)
Thread to match the t-shirt (although a contrasting color might look cute too)
Ball point or stretch needle
Paper
Small, sharp scissors
Pinking shears (optional)


STEP ONE: Making the pattern and marking the stitch lines

Grab a standard-sized sheet of paper and fold it in half with the shorter sides meeting.  Dig deep into the skills you honed in elementary school and draw half of a heart (against the fold, of course) that is a little less than half the width of the chest of the t-shirt, and just about the height of the paper.  Cut it out, open it up, and check to make sure it will fit the front of the shirt.  Make sure there are a couple of inches on each side to account for the shirt curving around the sides of the torso.


Take a pencil (or one of those fancy disappearing fabric pens) and trace around the heart.


Use a ruler to draw parallel diagonal lines across the heart.  I made mine an inch apart, but I might make them a bit closer next time I make another shirt.  Come to think of it, this would make a good present for each of the birthday parties Charlotte is invited to over next couple of weekends . . .


STEP TWO: Pinning and stitching the shiny fabric to the t-shirt

Cut a scrap of your shiny fabric that is a few inches larger than your paper heart on all sides.


With the RIGHT side of the shiny fabric facing the wrong side of the front of the shirt (inside the chest), pin the fabric carefully around the heart and in between each of the diagonal stitching lines.  Yeah, it looks like a pin cushion exploded onto the t-shirt, but trust me -- the knit fabric of the t-shirt and the shiny fabric on the inside will want to shift around a lot.  Pin them into submission.  Don't let that fabric boss you around.


For this next part, I actually used my new walking foot just to try it out.  You totally don't need a walking foot though.  The first shirt I made for Charlotte a couple of years ago was sewn without a walking foot, and it turned out great.  Just make sure you are using a ball point or stretch needle, and that you make any necessary adjustments to your settings on your machine (if you have them).  Practice with a scrap of t-shirt fabric with some of the shiny fabric underneath and make sure you have it figured out before you start tearing up the shirt with the wrong settings!

First, stitch all the way around the heart.  Then stitch down all of the diagonal lines, one by one.  Make sure to do a lock stitch at the beginning and end of each diagonal.  Start each diagonal from the same end -- it doesn't matter whether you always start at the top or always start at the bottom if you make sure to be consistent.  It doesn't have to be perfect without any ripples, but try your best to stitch neatly.


STEP THREE: Shredding the heart

Okay, so maybe we're not so much "shredding" the heart as we are taking small, sharp scissors and caaaaaaaarefully snipping between each stitch line.  You're just cutting the t-shirt though -- don't cut the shiny fabric underneath and definitely don't cut all the way through back of the t-shirt.  Let's keep it civilized here.

Make a teeny snip in the t-shirt layer ONLY, just inside the heart-shaped stitch line between the diagonal stitch lines.  Then, staying roughly in the middle, snip all the way to just inside the other side of the heart-shaped stitch line.  Go slowly and don't get too excited.  You don't want to snag the shiny fabric.


See the shiny side of your fabric peeking through?


Repeat between all of the diagonals, until it looks like this:


STEP FOUR:  Finishing up

Flip the shirt inside out.  Grab some pinking shears (or your regular scissors) and cut off the excess shiny fabric to about 1/2"-3/4" outside the heart-shaped stitching line.  It's going to look all rough and nasty inside, but no one will ever see this part and it has never irritated my daughter's skin.


Wash the shirt again to get rid of all of the teeny threads that will work their way off of the pinked edges of the shiny fabric.  This will also make the cut edges of the t-shirt knit to roughen up and get wavier.

And there you have it!  Your child can look like she was attacked by a vampire too.  Ahem.


Uh oh -- I actually found the photo I had posted on the blog a couple of years ago when I made Charlotte's first shredded heart t-shirt.  The gray shirt with the red shiny fabric underneath looked really cool.  I do not, however, have any idea why my children were hanging around with what appear to be pairs of Charlotte's underpants on their heads (not to mention Peter's shirt being inside out and backward).  My kids are so strange.


______________________________________________


Sunday, April 6, 2014

Adventures in iron-on vinyl

A crazy wallpaper-removal project and a super nasty stomach virus have SERIOUSLY cut into my sewing time lately.  It's not cool at all.  I do have a couple of things done and in development, but since they are surprises/gifts for people I can't share them just yet.  In the meantime, I got my hands on some iron-on vinyl and decided to try my hand at decorating some store-bought t-shirts for the kids.

First, I had to do something to pay homage to Peter's recently developed obsession with Transformers.  It is seriously a legitimate obsession.  Fueling the fire is the fact that my sweet husband still has all of the Transformers toys from his childhood, and the two of them play with them together every chance they get.  I love the simple graphic of the Transformers logo (the Autobots one, of course), so I dug out my neglected Silhouette and used it to cut out a turquoise version of the logo.


Peter had so much fun posing for the pictures that I just couldn't stop taking them.  Here he is, starting to "transform".


I'm so scared to wash the shirt, and I'm hoping I remember to turn it inside out.  I'm not sure what he was transforming into, but he sure took it seriously.


I probably broke every rule getting this stuff cut out properly.  I am not very confident with my Silhouette (and probably need a new blade for it, actually) and had to set the blade on the deepest depth to get it to actually cut all the way through the stupid vinyl even though the auto settings for the material indicated a much shallower cut.  Who knows what I'm doing wrong.  I just bought a roll of Cricut-brand iron-on vinyl at Jo-Ann's instead of ordering the Silhouette brand, so that could have been part of the problem.  Regardless, I finally got it to work and was thrilled with the result.


I think it's safe to say Petey Pie was thrilled as well.


I bought neon pink vinyl with the idea to make Charlotte her own Transformers shirt as well (she watches the show as much as Peter does!), but she wasn't interested.  After I got over my disappointment, I decided to find out what she wanted instead.  She asked for a big flower, so I just traced and hand-cut a flower on her vinyl.  We stuck a hand-cut turquoise center for the flower to give it a little more interest.  Here is Charlotte, modeling her "crazy smile" that drives me bonkers.  Her crazy hair in the photo makes her look even more insane, unfortunately.


The neon pink vinyl was the type that came as a single sheet (Tulip brand) that I picked up in a different aisle from the Cricut vinyl.  It does not seem to be as good of a quality, and if you look closely at it you can sort of see the black shirt behind.  I'm curious to see how it washes as compared to the turquoise.  Also, the mylar protective layer was difficult to pull off and left strange lines behind on the vinyl.  We'll see if those go away after a wash as well.  All in all, I was not impressed with the Tulip-brand iron-on vinyl and would splurge on the Cricut vinyl if I ever did this again.  When my niece and nephew see the Transformers shirt in a few weeks at Easter, I might have a couple of more orders on my hands, though!


Considering the expense of the vinyl (and the fact that Jo-Ann's coupons don't work on Cricut supplies), I will probably just stick to appliqué in the future.  I would like to try some freezer paper stenciling with fabric paint at some point, but I need to work my way through a long to-do list of sewing projects first!


---------------------------------------------

Update!  After washing (inside out, on gentle cycle) and drying (on gentle as well), the shirts look okay, but not amazing.  I think I might just stick to appliqué.

Sunday, March 16, 2014

LET'S GO DUKE!

In less than an hour, Duke University (my alma mater) will be playing University of Virginia in the ACC championship title game.  Charlotte now has a fabulous new circle skirt made from our old t-shirts so she can cheer on the Blue Devils in style!


I pieced together squares cut from the backs from four t-shirts (the lighter blue one was actually Corey's old Duke shirt, but the other three just happened to be in good colors), then cut it into shape.  Afterward, I appliquéd on the logos so they would be in the right place near the hemline.  The border between the gray and navy panels is the front middle of the skirt.  Finally, I sewed on a 3" wide elastic waistband and zigzagged around the bottom of the skirt for a little extra detail.


I sewed the skirt while Charlotte was at school on Friday and just sort of winged the length.  It came out a tad long, but it is winter after all, right?  I stuck it on Charlotte right after she got off the bus and had her pose a little.  Her hair looks a little bedraggled because this dry winter air is not kind to Charlotte's fine hair -- especially after taking hats on and off all day!


Best thing about a circle skirt?  The twirlability!  Yes, that is a word (at least in this household).


Crossing our fingers for an ACC championship trophy to get March Madness started out on the right foot!

Thursday, March 13, 2014

Some Happy Birthday shirts for Charlie Jo

Sweet Charlotte turned 6 this week, and I made not one, but TWO appliqué shirts for her.  The first was the traditional (or what has become traditional in this household) number shirt:


It's short-sleeved, so she was wearing it over a white long-sleeved shirt.  I took this pic as she was modeling her new sunglasses, necklace, and denim vest.

The second shirt is one I actually want to make for myself as well.  Now everyone will know that Charlotte is really Wonder Woman!


Wednesday, May 1, 2013

Really really long post of Niki's past projects

Don't hate me because I have a pathological burning need to be complete in documenting my sewing adventures.  Holy cow, I really DO keep Jo-Ann Fabrics in business . . .

Oh my gosh, tissue pack holders are crazy fun to make.  I made the one on the top from this tutorial, and the one on the bottom from another one that I have since deleted off my Pinterest board because I liked the other one so much better.  The bottom one is totally lame compared to the top one.


Here is another one of the cool kind.  It's a great way to use up tiny scraps from old projects.


I love love love this sewing caddy.  I obviously don't use it for carrying sewing supplies, but I totally could.  It features pockets on the inside AND on the outside, and was fun to sew.  The handles are floppier than I would like, but I can't remember if that is because I didn't follow the exact instructions.  that is always a strong possibility since I usually just use what I have on hand rather than running out to buy the exact brand and type of interfacing or weight of fabric.


I'm using the caddy to hold all sorts of other little goodies I sewed.


Like this really lame camera case for Charlotte's camera!  Early last year, I got all ambitious and tried to quilt some material and wing some little bags for Charlotte's and Sonia's new cameras.  I learned two things: (1) quilting needs a walking foot and is a lot more complicated than throwing together a sandwich of fabric and batting, and (2) I needed a lot more practice actually sewing bags before trying to design one myself.  In fact, at this point, I don't think I had discovered online sewing tutorials.


The very first online sewing tutorial I followed was for a "Car Cozie" (a car caddy to bring to restaurants, doctor's appointments, etc. to hold cars and provide a street for them to run the cars on).  I fell in love with them and made something like 14 of them by the time the summer was over (for all of the cousins, friends, and even one for Corey -- per his request).  I made this one for Charlotte:


And this one for Peter:


This is what it looks like all rolled up so you can throw it in your purse:


Since the car caddy was such a huge hit, I followed another tutorial (that I have since deleted because the directions were cruddy) to make all of the kids crayon caddies (they roll up in a similar manner, but I didn't take a picture of one all rolled up for some reason):


This diaper caddy (Do you see a theme?  I seem to like caddies . . .) worked out great until Peter got (sort of) potty-trained last month.  Now it's waiting to find a new use.  Too bad I can't find the tutorial I used for this one, either.


At some point, I discovered what I thought was oilcloth in the remnant bin at Jo-Ann's.  I made Steph and myself "wet bags" (thought the tutorial calls them "grocery totes") to bring wet bathing suits home from the beach in last summer.  Turns out, this is really some sort of cross between vinyl and oilcloth, and I have yet to figure out the exact name.  It's found in the utility fabrics section.  This was my first round-bottomed bag, and it was fun to see how it all went together:


I winged this tote to give Peter a little bag for carrying around his treasures.  Turns out he's not as interested in doing that as Charlotte is, but he certainly likes the bag.  I brought it with me filled with Peter's car caddy and crayon caddy when I needed to entertain Peter during Charlotte's ballet classes:


This Olivia Bag was fun to make, but turned out smaller than I had imagined.  I also had a rough time with the top stitching, never really fixed it, and just gave up on it after Erin crocheted me my awesome new purse.  I loved that the tutorial taught me how to do an internal zipper pocket, though!


All last fall, Erin and I carried these purses that I made out of my old jeans.  I found a couple of tutorials on the web for jeans purses and hated that they had stupid things like raw edges inside and really thin bottoms, so I used the skills I had learned from making a bunch of other bags and to sort of design this myself.  I made a few more of them from Charlotte's old jeans and cords and they turned out even cuter (since her butt is so much smaller!).


This winter, I bought some Insul-Bright and went a little crazy making potholders for a while.  This "oven hand mitt" is the one I made that I liked the best.  I'm kicking myself for not taking pictures of the cool one I made for Jordan or the Star Wars one I made for his friend (to match the aprons I made for each of them, too!).


This fun little "fabric box" turned out to be perfectly-sized as a pencil holder.


Here is the super cool purse Erin crocheted for me.  I sewed the lining for the purse based on this tutorial, and I used the wrap from Erin's bridesmaid dress for Ali's wedding as the fabric!  Erin had given me the fabric ages and ages ago. and it works perfectly as a purse lining.  I also sewed the little fabric key chain to match the jeans purse that I used to carry, but it still looks cute with the crochet purse.


Here is another one of the snappy bags.  Fun fact: I got in huge trouble with Corey when I cut up his nicest tape measure to use in it.  Whoops.


I adore adore adore this dumpling pouch.  The fabric is cute, the pattern was fun to follow, and it holds a surprising amount of stuff in my purse.


I have sewn some pretty superfluous and unnecessary things just for the fun of it, but this may take the (cup)cake.  It's a cover for my checkbook.  I made the not-cut-on-the-bias tape myself, which is awfully cute in the strawberry fabric.


This little boxy zipper pouch was great to make, but it's unlined and you just can't zigzag enough with a regular sewing machine to get the raw edges inside to look good.  I have since found tutorials for lined box zipper pouches, and would choose those tutorials instead next time I make one.


I made this tablecloth and the set of cloth napkins for Charlotte's tea parties.  I sewed them over a year ago (before I discovered the wonders of online tutorials and the effect of the grainline in fabric) and they're a little bit funky as a result.  I designed it myself and couldn't have done a worse job.  Please don't look too closely at any of it.


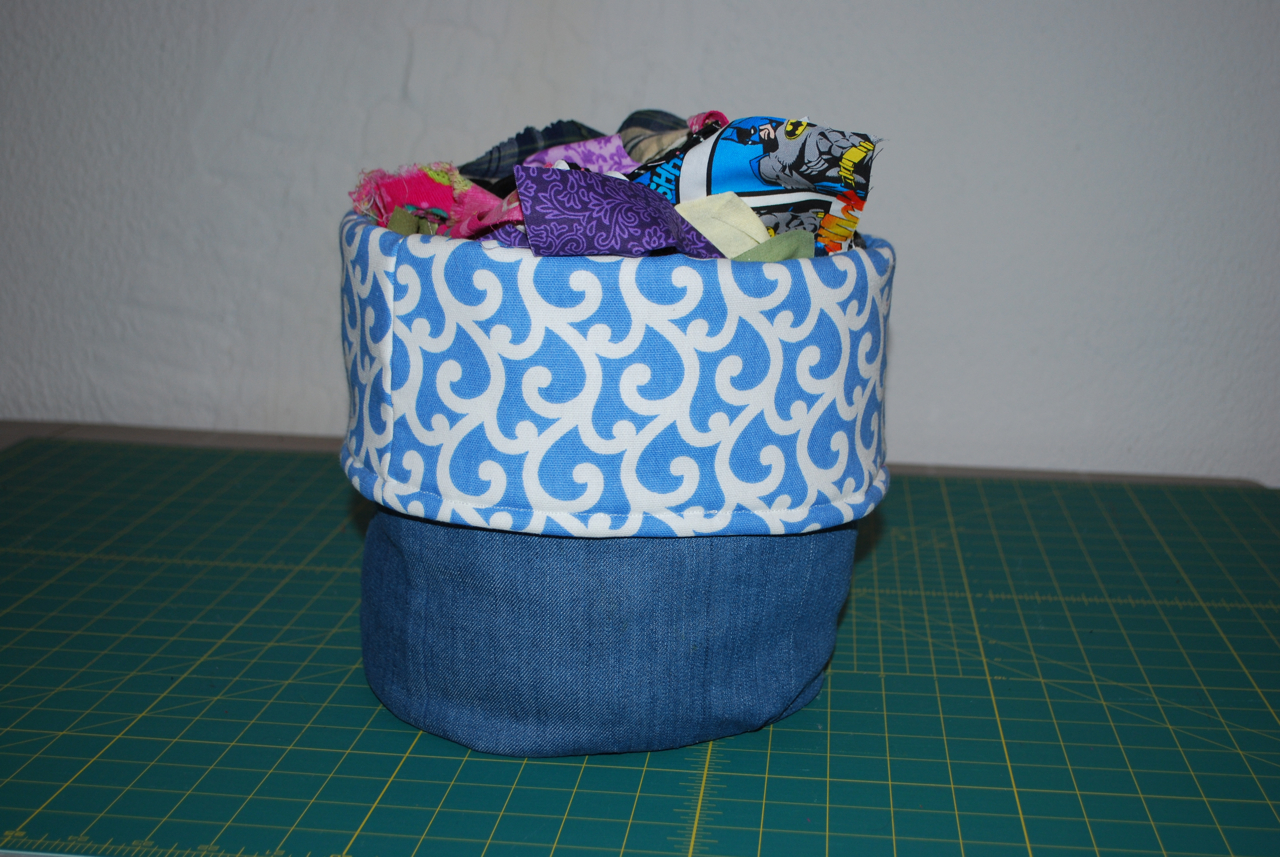
This is my denim scrap basket.  Charlotte loves looking through my old scraps, and I need to come up with some sort of project for her to use them so they don't overflow!


Now THIS is actually oilcloth (aka laminated cotton).  Once I finally buy some more bright green thread, I will finish topstitching around the edges of them and will have some great kid-friendly laminated place mats for the summer!


Here is the backside (a great heavy oilcloth I found on my pilgrimage to Haberman Fabrics in Royal Oak):


I made these curtains for Charlotte's room back in 2009.  They are actually two separate valances (because her old room had two skinny windows) squished together on one rod to fit the big window in her new room.  The buyers of our house in Tennessee had checked the option that they wanted our "window coverings" which technically included the valances, but since I was pretty darn sure the buyers didn't actually want my hand-made crap, I left them a stamped, addressed envelope for them to mail back to me any of the valances they didn't want.  They sent back these, the ones from Peter's room, and the ones from the bonus room, but they didn't send me back the valance I REALLY wanted -- the cool tab topped one I had made a decade ago and still adored.  Wah!


My great pillow sham piping experiment turned out better than I feared when I made Charlotte these two throw pillows for her bed.  The purple one actually has a zipper closure!  Too bad I only had a black zipper on hand and was too anxious to finish the project to wait until I had a matching zipper.  Charlotte really loves the one with the heart applique, and insisted on sleeping on it instead of her real pillow for several weeks.


This dresser scarf was made to match Charlotte's valances and to test out the decorative stitches on my new (well, it was new then) Brother sewing machine.  It was made out of my own imagination, before my imagination knew about things like batting and quilting.


I actually took an old t-shirt of mine and downsized it to fit Peter!  I used Dana's tutorial for the pattern and technique of putting it together, but cheated by using the hems off of the original shirt sleeves, hemline, and the shirt's original neck binding.  I really should have rebound the neckline because an adult t-shirt neckline has too shallow of a curve.  The shirt is a little funky, but Peter doesn't care.


This diaper caddy has been transformed to an underwear caddy now that Peter is sort of potty trained!  Petey can't reach his underwear drawer, so I put his undies in this in his closet since he needs to change them so often.  Ahem.


I used the method of putting in a waistband a la the circle skirt, but the bottom part (recycled from some old t-shirts, is not a circle.  The skirt is NOT super flattering on me, but Corey loves it because it has the Michigan State logo appliqued on it.


This little tote bag was a blast to make.  I cut the pocket off of one of Corey's old shirts and it looks hilarious on there.


This pleated tote looks huge, but doesn't really hold a ton because it's flat.  It was a fun introduction to pleats, though!  After I made it I decided I hated the fabric, so it hasn't been used that much.


This tote has has been really handy.  Who knows where I found this original tutorial, because I can't find it anymore.  The tote has six pockets on the outside and I really love the stripes.  I want to find more of that material to make some more stuff.  That's the problem with always buying remnants -- yes they are 50% off, but they also are hard to ever find again!


This is Petey's other cape (made from a pattern created in my own little pea brain).  It was not the original one -- that one was quickly destroyed because I made it out of my high school graduation gown, which was some crazy thin man-made nasty material.  I salvaged the "P" applique and reapplied it to this new cape.  The blue nylon fabric was from an old laundry bag that had never been used much.


This pleated zippered pouch is of my favorite pouches ever!  I use it every time I travel.  The pleated pouch tutorial is really well-written and easy to follow.  The striped fabric was left over from some valances I made for Erin's apartment when she was first married.


Finally, this is the wardrobe I made for Charlotte Doll for Charlotte's birthday.  This "Katie Dress" was my first dress that has a bodice!  It has a zipper in the back and my first use of piping in a fashion sewing project.  I got the skirt's pleats all wonky when I sewed the skirt to the bodice because that darn polyester does NOT like to hold a pleat in place, no matter how much you iron it.  Yes, Charlotte Doll's hair is all wonky because I was practicing different types of braids and didn't bother to restyle it for the photo shoot.


Charlotte doll also needed her own pillowcase dress.  I figured Hello Kitty fabric was a good choice, but it doesn't do much for Charlotte Doll's figure.  Hee hee.


My first experiment in shirring!  The bias tape along the top is kind of lame, so I would skip that step next time.  The straps Velcro closure in the back.  The top and the matching tote were made from my little pea brain.  Now Charlotte Doll needs some coordinating shorts!


Auntie Ernie crocheted this awesome top, and I made a teeny circle skirt to match.


My first attempt at a t-shirt for Charlotte Doll was a disaster.  This is take #2, and despite the fact that it looks like a mock turtleneck (barf!), the rest of it worked out well.  The back has a Velcro closure.  The tutu underneath is just a circle skirt stitched to 1" elastic for the waistband.