Showing posts with label clear vinyl. Show all posts

Saturday, July 16, 2016

Pool Pouch -- Sewing Tutorial

We finally joined a pool this summer, so I have been spending many many hours watching my goofball children swim.  Inevitably, one or the both of them walks up to me to tattle or beg for a snack, and this results in them somehow getting me and the stuff I'm holding soaking wet.  I don't know how those little bodies can drip off a gallon of water during a simple snack request, but somehow they do it.  My phone needs protection!

I have sewn a few other pouches from tutorials for similar projects to protect your phone by the pool.  I wasn't completely satisfied with any of the finished products, so I decided I needed to design my own.  This pouch is great because you can work the touch screen on your phone through the clear vinyl and avoid dripping on your phone if you're wet yourself.  My brother and I tested it, and you can even answer a call and talk on the phone with the phone still safely zipped inside!  The finished product easily fits an iPhone 6 with a case on it.  You may want to adjust the sizing accordingly if your phone is much larger or smaller.


Pool Pouch -- Sewing Tutorial

Materials Needed:


  • Clear vinyl (any gauge will do -- I used a fairly thin gauge but a thick one works too)
  • Main fabric (quilting weight or heavier)
  • Back fabric (home decor weight or quilting weight paired with interfacing)
  • Bias tape (extra wide, double fold, about 30" long)
  • Fusible web (like Wonder Under or Heat 'n' Bond, any "strength")
  • Zipper (at least 8" long)
  • Grommet (large, about 1" diameter at the outside)
  • Carabiner (one that will fit through the grommet and be able to attach to your pool bag strap)
  • Zipper foot
  • Masking tape (if you don't have a Teflon foot for sewing over the vinyl) 
  • Thread to match your zipper, your main fabric, and your bias tape
  • Wonder Clips, binder clips, or paper clips
  • [Optional: cardboard (or a manilla folder) to draw a pattern out of to help with cutting the vinyl.]


FINISHED DIMENSIONS: 8" wide by 6" tall
Seam allowances indicated throughout.


STEP ONE: Cutting the fabric and vinyl

From your main fabric and your back fabric, cut an 8" x 6" rectangle.  If you're using directional fabric, the 8" is the width.  Then cut a 1" x 8" strip of each.  For this project, the flowered fabric was my main fabric, and the denim was the back fabric.


Cutting the clear vinyl is a PAIN IN THE BUTT -- your ruler will stick to it, and you will be cursing me by the time you are done.  I think it's easier to make a little pattern out of cardboard or from a manilla folder to help.  That way I can use my rotary blade to trace around it (or I could use a permanent marker to trace and scissors to cut).  From the clear vinyl, you will need one piece that is 8" x 6", one piece that is 8" x 5", and one piece that is 8" x 1".


(I didn't take a photo of all of the pieces cut out, because photographing clear vinyl is an exercise in futility.)  I actually just cut two pieces that were 8" x 6" and then sliced an 8" x 1" strip off one of the pieces to end up with my three vinyl pieces.

Also, grab your Wonder Under or Heat 'n' Bond (or whatever fusible web you have handy) and cut an 8" x 6" rectangle.

In summary:

From the MAIN FABRIC:
  • 8"w x 6"h
  • 8"w x 1"h
From the BACK FABRIC:
  • 8"w x 6"h
  • 8"w x 1"h
From the CLEAR VINYL:
  • 8"w x 6"h
  • 8"w x 5"h
  • 8"w x 1"h
From the FUSIBLE WEB:
  • 8"w x 6"h

STEP TWO: Prep work

Take your 8" x 6" main fabric and back fabric pieces and fuse them together with the fusible web with the WRONG SIDES TOGETHER.  If you want to add a label to your pouch, do it either before (if stitching it on) or after (if fusing the label on) fusing these fabrics together.  I didn't add one to this project and I'm still kicking myself for forgetting.


Do you have one of those cool Teflon feet for your machine that allows you to sew smoothly over vinyl or oilcloth?  If so, great.  If not, just grab some masking tape and put it on the bottom of your regular foot (cutting out the spot where the needle goes through).  Works like a charm.

Now thread your machine with thread that matches your MAIN FABRIC.


STEP THREE: Installing the zipper

Grab your 8" x 1" strip of back fabric and lay it face up on your work surface.  Then, lay your zipper FACE UP on top of that (so the right side of the back fabric is facing the wrong side of the zipper.


Find your 8" x 1" clear vinyl strip (which is easier said than done since that sucker is nearly invisible) and lay that on top of the zipper, even with the edges of the back fabric.


Finally, lay the 8" x 1" strip of main fabric on top of the clear vinyl, with the right side down.  Make sure the edges of the fabric and vinyl are all lined up at the ends and along the middle.


Since you can't use pins with clear vinyl, secure everything with Wonder Clips, binder clips, or even paper clips.  Just don't puncture the vinyl.


Sew a 1/4" seam along the long side.  I have read recommendations to use a slightly longer stitch when sewing vinyl, but I have never really noticed that it made much of a difference.  I just stick with my regular stitch length and it works just fine.

You can use a zipper foot if you like.  I tend to get a better result just using my regular foot with the needle all the way in the left-hand position, but who am I to judge?


You already put the masking tape on the bottom of the foot, right?  If not, do it now.

Open up the zipper sandwich and fold the fabrics and vinyl away from the zipper.  (Now the main fabric strip and back fabric strip will have their wrong sides facing each other, and the clear vinyl is on top of the main fabric.)  Normally, I would iron a nice crease there, but the clear vinyl melts like butter at the thought of being touched by an iron.  So, finger pressing has to do.  Top stitch close to the edge (about 1/8" away) to hold everything in place.  You can't really see the clear vinyl in this photo, but rest assured it's there!


Now, grab your 8" x 5" rectangle of clear vinyl and line one of the 8" edges up to the opposite edge of the zipper.  The zipper should be face up (with the main fabric also facing up).  Make sure the 5" edges match up with the ends of the fabric.  Clip into place.


Switch the thread in your machine to one that blends into your zipper.  Trust me on this one -- it will look much better this way.  Otherwise, the stitching sticks out like a sore thumb.

Sew the vinyl to the zipper with a 1/4" seam allowance.  It's hard to see (because I used thread to blend into the zipper tape!) but it's there.


Fold the clear vinyl away from the zipper and finger press it into place.  Then top stitch close to the edge (about 1/8" away) to hold the vinyl down into place.  See how the top stitching also disappears?


Finally, pull your zipper pull in between the edges of the fabric and vinyl and baste the zipper together just inside the outer edges on both sides.  (This isn't necessary if you're using an 8" zipper, but I was using a 12" one because it was what I had on hand.)  Trim off the excess zipper beyond the edges on both sides.


STEP FOUR: Assembling the pouch

Locate the fused-together pieces of main and back fabrics.  Lay it down with the main fabric facing up.  Grab your piece with the zipper and lay it right on top, with the zipper facing up.  Trim away any excess vinyl at the bottom or sides and make sure everything is squared up.


Clip the layers all together.  If this project DIDN'T include vinyl, we would probably baste around the edges before stitching on the bias tape.  Because we don't want to put any more holes in the vinyl than absolutely necessary, we're going to skip this step.


Instead, we're going to clip the bias tape on (sandwiching it around the layers).  Start on one of the sides and work your way around.  Take off and replace the clips as you go.  It may seem silly to clip and then reclip with the bias tape, but it's much easier to keep it all together this way.


When you get to a corner, make the turn . . .


. . . then go back and tuck in the excess at both sides to create a mitered corner (with the fold on the diagonal from the corner in toward the vinyl).  It's hard to see since I used black bias tape, but it's there.  Stick a clip on the corner to hold the miter in place.


Continue all the way around until you get to the beginning.


Cut off any excess bias tape, leaving about an inch or so overlapping.


Fold about 1/4" of the loose end into itself and pin it so it overlaps the beginning.  I know there are official ways to join bias tape without the lumpy fold, but since this is a pool pouch instead of an heirloom quilt, we're just going to call it good with the fold.


Now switch your thread in the machine to blend in with your bias tape.

Stitch all the way around the bias tape close to the inner edge.  Again, I know this is not the proper way to apply bias tape.  In the interest of minimizing the amount of stitching we do to the vinyl, we're doing it the cheater way to preserve the strength of the vinyl.


STEP FIVE: Finishing up

Grab your grommet and pick one of the lower corners.  Follow the package directions to insert the grommet.  I drew the inside hole right up to the inner edges of the bias tape, but didn't cut through it.  The grommet overlapped the bias tape when I pounded it on, which I like.

Tip: Use an Exacto knife to cut through the top layer of vinyl, then use sharp scissors to snip out the rest. Works like a charm!


Take your carabiner and stick it through the grommet.


Slip your phone into the pouch, and hit the beach!  Or the over-chlorinated pool!  Whatever floats your boat.


Clips on nicely to the handles of my big tote.


(Yes, I did a crap job of sewing the bias tape on, but I will do a much better job next time.  My mom, aunt, and neighbor have all requested pouches of their own so I will make them super cute ones with nice, straight binding.)

Friday, February 6, 2015

A crocheting & knitting bag for Erin -- FINALLY!

Weeeeeeeell, I kind of promised Erin a new crocheting bag a long time ago.  Then I promised her I would have it to her by Christmas.  Then, it got to be February and I still didn't have it finished.  I'm the worst twin sister ever sometimes.

The good news is that I finally finished it!  She wanted it to have vinyl because apparently she has exhibitionist yarn.  Her skeins like to be be seen, darn it.  Here it is with the drawstring top closed (and sagging down a bit on the inside).


And here is it with the top open.  It can fit a buttload of yarn, a bunch of hooks, a crapload of needles, and a few works-in-progress without breaking a sweat.


I always love a project that includes vinyl, but inevitably I feel like I have wrestled an alligator by the end of it.  I made up this bag as I went along, which is always a dangerous thing to do.  I don't think I would make it the same if I ever made it again (and I'm not in a hurry to do so).  Some of the finishes are not the greatest, but I'm hoping Erin will promise me that she won't look too closely at it.

The exterior is a home decor weight fabric and the lining is actually from an old sheet Erin gave me.  I didn't add any interfacing because the bottom has a double layer of the heavier exterior fabric, but if I made it again I might rethink that decision.

I'm popping it in the mail this morning if all goes well!

__________________________________

Featured at: Sugar Bee Crafts

Linking up to: Creating My Way to Success, Scattered Thoughts of a Crafty Mom, A Bright and Beautiful Life, Sew Can Do, ChrisW Designs, Skip To My Lou, Nap-Time Creations, Sugar Bee Crafts, The Silly Pearl, The Stitchin' Mommy, Sweet C's Designs, Tiny SidekickMabey She Made It, Funky Polkadot Giraffe And Sew We Craft

Saturday, October 12, 2013

Neat Finish Window Pouch Tutorial


I have two weaknesses -- zipper pouches and clear vinyl.  Combine the two and I'm hard-pressed to pass up a chance to sew one.  My biggest complaint about all of the tutorials I have tried for window pouches so far is that they leave raw edges on the inside to some degree.  Designing a pouch with a clear vinyl window is tricky because you can't fully line it without blocking the window, thus negating the whole purpose!

I designed the size of this pouch to accommodate the car registration and insurance paperwork that we are required by law to carry around in the glove compartments of our cars.  Somehow, they always end up munched at the bottom of the compartment and are difficult to find when the need arises.  I have to credit Corey with the idea of sewing a window pouch to hold them, though I doubt he cares very much whether there are raw edges inside.  I wanted the pouch to have a little body to it so the paperwork would remain safe, so I grabbed a damaged canvas grocery bag, cut it apart, and came up with this:


Neat Finish Window Pouch -- Sewing Tutorial

Materials Needed:

Canvas (duck cloth, interfaced quilting cotton, or home décor weight fabric also work)
Lighter coordinating fabric (quilting cotton works great)
Clear Vinyl (any gauge)
Zipper (at least 8” long)
Coordinating thread
Denim or leather needle

Materials needed


Cutting instructions:

From the canvas, cut:
-       one piece 9” x 6 1/2"
-       six pieces 9” x 1 1/2"
-       four pieces 2 1/2” x 4”
-       two pieces, 4” x 1”

From the coordinating fabric, cut:
-       one piece 9” x 6 1/2"

From the clear vinyl, cut:
-       one piece 5” x 4”

Seam allowances will vary throughout the project, and will be indicated at the appropriate times.  You won’t need a Teflon foot or walking foot to deal with the vinyl, because your presser foot never actually touches the vinyl in this project!

Finished size of the pouch: approximately 8" x 6"


STEP ONE:  Framing the vinyl

Sandwich two of the 2 1/2" x 4” pieces of canvas around the short end of the vinyl, lining up the raw edges with the edge of the vinyl and with the right sides of the canvas facing the vinyl.  [Do not use pins – use binder clips or Wonder Clips instead or else you will end up with holes in your vinyl.]  

Step one: framing the vinyl


Sew with a 1/2" seam allowance.  Finger press the seam open.

Step one: framing the vinyl


Repeat on the other size of the clear vinyl.

Step one: framing the vinyl


Sandwich two of the 9” x 1 1/2” pieces of canvas along the long edge of the vinyl, lining up the raw edges of the canvas with the edge of the vinyl and with the right sides of the canvas facing in to the vinyl.

Step one: framing the vinyl


Sew with a 1/2" seam allowance.  Finger press the seam open along the vinyl, and use an iron to press the seam open where only fabric is sewn to fabric.  Don’t melt that vinyl!  

Step one: framing the vinyl


Repeat along the opposite edge.  Now the vinyl window is nicely framed.

Next, topstitch all around the edge of the fabric, right outside the vinyl.  I find that I need to tighten my upper tension a bit when sewing through vinyl and heavier fabrics.  It didn’t matter so much in the previous steps, but topstitching on the vinyl (and later for topstitching the canvas with the zipper) causes my machine to need this adjustment for some reason.  

Step one: framing the vinyl


Set this cute little framed window aside until the end of the next step.

Step one: framing the vinyl


STEP TWO:  Sewing in the zipper

Lay out your zipper and mark two places 6 1/2" apart from each other.  (I always keep long zippers on hand so I will have one long enough for whatever project I sew, so that’s why I’m using a 14” zipper.)  It doesn’t matter at this point where you mark the zipper in relation to the zipper pull, but just make sure neither of the marks are outside either side of the zipper stoppers.

Step two: sewing in the zipper


Take one of your 4” x 1” pieces and lay it with the right side facing the right side of the zipper with 1/4" of the fabric overlapping the mark you made at the end of the zipper (not the side with the zipper pull when the zipper is closed).  The fabric should be aligned with the zipper, but I pulled it down out of place to show where it is in relation to the mark.

Step two: sewing in the zipper


Sew the fabric to the zipper at the mark (with a 1/4" seam allowance from the end of the fabric piece).  

Step two: sewing in the zipper


Trim the zipper that extends past the material.

Step two: sewing in the zipper


Open up the seam and finger press (or very carefully press with an iron, being careful not to melt the zipper!) the fabric away from the zipper.

Step two: sewing in the zipper


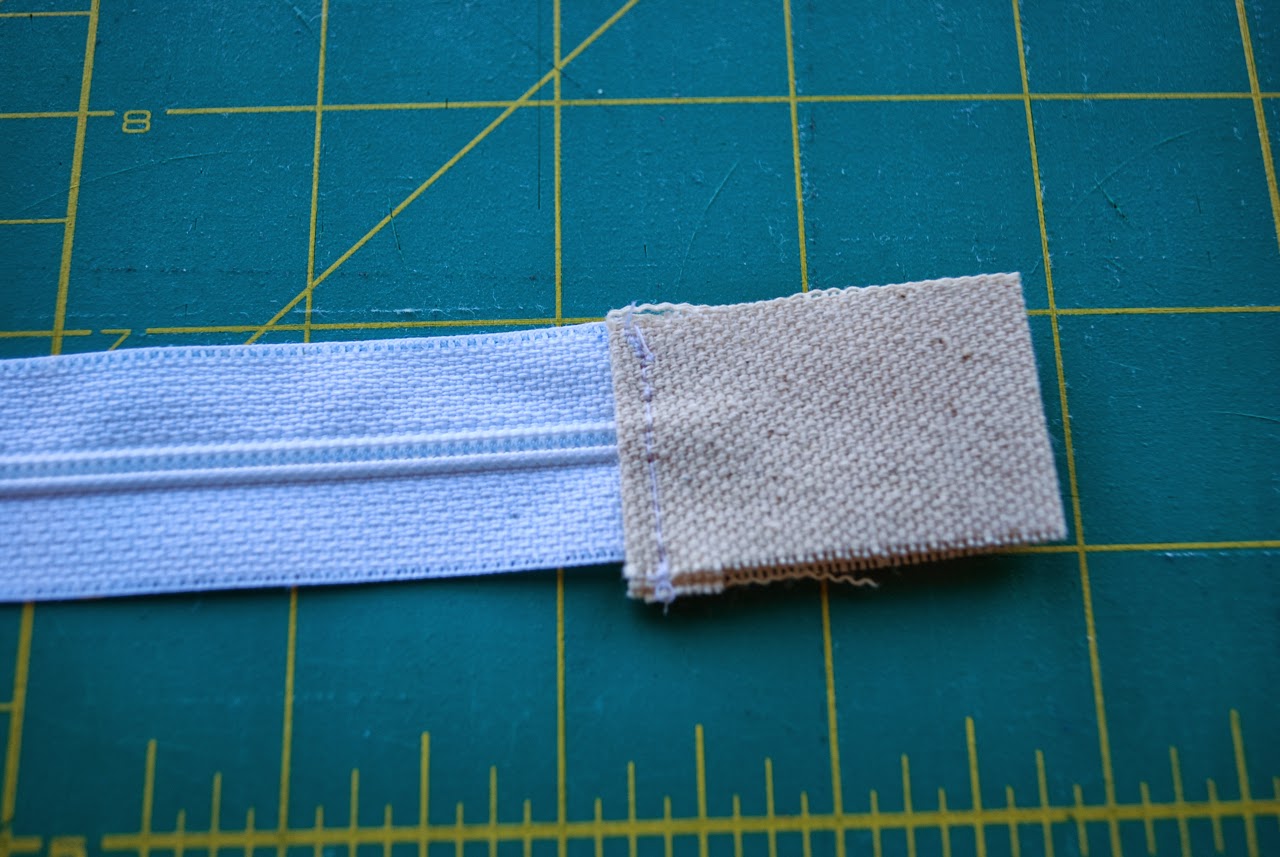
Flip the zipper over and fold the fabric piece over to meet up with the its other end, tucking 1/4" of the fabric toward the wrong side to hide the raw edge.  Finger press (or carefully press with an iron) it all flat.  

Step two: sewing in the zipper


Flip the zipper back over again and topstitch the little fabric sandwich you have made at the edge of the fabric.

Step two: sewing in the zipper


Repeat the process with the other side, but first unzip the zipper so that the zipper pull is between the two marks. 

Step two: sewing in the zipper

Step two: sewing in the zipper


Take the last two unused 9” x 1 1/2" strips of canvas and sandwich the zipper between them (right sides of the strips facing inward), lining up the edge of the zipper tape with the raw edges of the canvas strips.  The fabric ends of the zipper will be longer than the canvas strips, so just center the zipper so that equal bits of the fabric ends stick out on each side. 

Step two: sewing in the zipper


Using a zipper foot (or if you’re lazy like me, just change the needle position to all the way over to the left), sew the sandwich all together.  It’s a little tricky because you can’t feel the zipper at the beginning where the fabric tabs are, so just sew with about a 1/4" seam allowance until the zipper begins.  Carefully press the seam open with the iron, and then topstitch at the edge of the fabric along the zipper.

Step two: sewing in the zipper

Step two: sewing in the zipper


Now this next step really bugs me, but there doesn’t seem to be any good way around avoiding sewing in the bottom side of the zipper this way.  To me, this is a completely bass-ackward way to insert a zipper, though I have seen tutorials that teach zipper installation this way.  First, you need to take your framed window and decide which way is up. 

Pull apart the top layers and trim the seam allowance inside down as far as you easily can.  This pic was taken before I had trimmed.

Step two: sewing in the zipper


Now carefully fold in both sides 1/4" and press them down.  

Step two: sewing in the zipper


It should look like this now:

Step two: sewing in the zipper


Now take your piece with the zipper and nestle the bottom of the zipper (the side not already sewn in between the canvas strips) between the folded-in edges of the window piece.  Try your best to get the edge of the folds lined up the same distance away from the zipper as the top is.  

Step two: sewing in the zipper


Now either temporarily tape the zipper in place or use some big binder clips to help you keep everything from shifting.  Sew the zipper in by topstitching it into place near the edge like you did when you topstitched the other side of the zipper.  It’s an ugly process and just doesn’t feel as neat and secure as the proper method does, but it does the trick. 

Step two: sewing in the zipper


Square off your window/zipper piece and cut off those pesky zipper ends that are still sticking out.

Step two: sewing in the zipper


STEP THREE: Assembling the pouch

Remember those other two 9” x 6 1/2" pieces you cut?  We’re finally going to use them!  First things first – lay one of them down on the table and place the window/zipper piece on top.  Is the window/zipper piece the same size?  Chances are, unless you’re a robot or are really good with consistent seam allowances, it will be off by a little.  Trim whichever one is bigger down to the size of the other.  If your 9” x 6 1/2" piece needed to be trimmed a little, make the same trim with the other 9” x 6 1/2" piece too.

Now lay down the 9” x 6 1/2" piece that you want showing on the outside of the pouch (the canvas one) on the table with the RIGHT SIDE UP. 

Then, lay down the window/zipper piece with the RIGHT SIDE DOWN on top of the canvas piece.  The right side is the side with the zipper pull sticking up.

Finally, lay the 9” x 6 1/2” piece of lining (the piece that you want to peek out through the window) on top of the other two pieces with the RIGHT SIDE DOWN.  Now you have your pouch sandwich all ready for final assembly.

Step three: assembling the pouch


You’re going to sew all the way around the pouch with a 1/3” seam allowance.  [That’s an odd size, I know, but it’s the width of my presser foot with the needle in the middle and it works for me.  You could totally sew with a 1/2” seam allowance if you prefer.]  BUT FIRST, you have to try this cool trick that I just learned and then completely forgot its source.  When I rediscover the genius to whom I need to give proper credit for this trick, I will give credit where credit it due!

At the bottom of the pouch (the edge opposite the one the zipper is closest to), find a spot two inches or so in from the corner.  From the very edge of the fabric, sew a few stitches perpendicular to the way your seam will run, just until you reach your seam line.  Then, leave the needle down in the fabric, lift up your presser foot, turn the work ninety degrees, and then start sewing your seam all the way around the edge of the pouch until you turn the corner onto the last side (the one you started on).  Only sew in a couple of inches (leaving open about a 5” space unsewn for turning the work right side out – kind of a big gap, but necessary because of the stiffness of the vinyl), then leave the needle down in the work, lift the presser foot, turn the work ninety degrees again, and sew to the edge of the piece. 

Step three: assembling the pouch

Step three: assembling the pouch


This encourages your seam allowance turn in after you turn the project right side out, and it helps somewhat to prevent the fabric from stretching due to the stress of inverting the pouch (aka “birthing the bag”, a phrase which totally cracks me up).  If the photos don’t help and you’re still confused, just ignore the previous couple of paragraphs and sew around the pouch with a 1/2" or 1/3" seam allowance, leaving unsewn a 5” space for turning.

Step three: assembling the pouch


STEP FOUR: Birthing the pouch and finishing up

After sewing the pouch together, trim the corners really well to get rid of bulk.  

Step four: birthing the pouch and finishing up


At the space left for turning, separate the layers between the window/zipper piece and the outside back canvas piece and turn it right side out.  Be careful not to munch up the vinyl too much.  The corners are difficult to poke out, but just do the best you can.  You can unzip the zipper now to peek inside and see that there are NO EXPOSED SEAMS!  Woo hoo!  Too bad you now have that annoying opening to close.  I know I didn't get the corners poked out very sharp, but the bulk of the canvas made that impossible. 

Step four: birthing the pouch and finishing up


I hate hand sewing.  HATE IT.  If I thought there was any pretty way to use a sewing machine to do the next step, I would totally have done it that way.  Unfortunately, I think the only good way to close up this gap is hand-sewing it closed with a ladder (aka blind) stitch.  It would be really unfortunate to go to such lengths to eliminate raw seams on the inside of the bag just to leave an ugly spot of whip stitching on the outside of the bag, right?  Here is a great tutorial on using a ladder stitch to close a gap.  Just make sure that the raw edges are going inside between the lining and the back outside canvas piece.  It's also important to make sure you are catching all of the internal layers, including the lining, or else there will be a hole left open inside the pouch.  Not that I accidentally did that the first time or anything.  Ahem.

This is what it looked like before I sewed it.  I forgot to take a close-up photo of it all sewed up nice and neat.

Step four: birthing the pouch and finishing up


All done!  Now stick in all the car registration and insurance paperwork and keep it safely inside the glove compartment.

finished pouch


Or take it outside and take pretty pictures of it among the fallen leaves.  I know I pulled in the turning gap a little too far when I was hand-sewing it closed, but just pretend you don't see that part.

Finished pouch


I love the back!  I'm so glad I found a good use for this old bag.  Fun fact -- my friend, Ivette, met her husband, Jon, at that brewery.

Back of finished pouch