Showing posts with label keychain. Show all posts

Sunday, January 25, 2015

Basket prototypes and presents

I went a little bit crazy sewing baskets over the last couple of weeks.  In my defense, I was trying to perfect my Boxy Fabric Basket and needed to try out a couple of different ideas.  Then I saw a tutorial for a hilarious woven basket that I decided I needed to try, because apparently I have a basket problem.


So what did I do with all of those baskets?

First, I gave one of my practice baskets (one that isn't in the above photo) to Charlotte's sweet friend, Lila, who turned 7 a couple of weeks ago.  As I have been doing for all of the birthday parties Charlotte has been invited to over the last month, I also sewed Lila a Shredded Heart T-Shirt.  Turquoise is Lila's favorite color, so I paired a turquoise tee with some shiny purple fabric underneath.


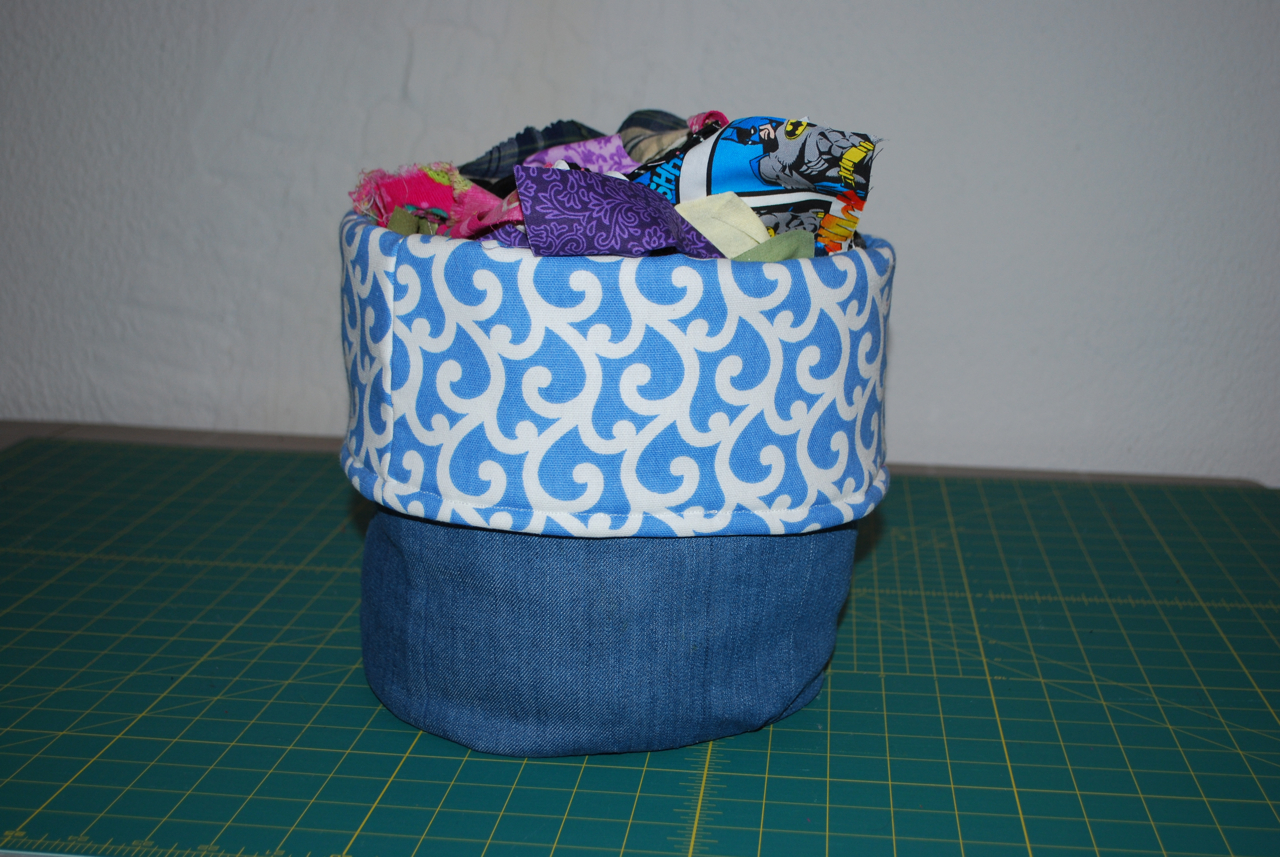
Lila is getting a sewing machine from her mom for her birthday (apparently it has yet to be purchased though), so I filled the basket with some scraps that I thought would interest her.  Most of them are quilting cotton, but I threw some fleece in there just for fun.  What better was to practice with a new machine than on some neat fabric scraps?  I had so much fun going through all of my fabric, and it helped me clean out my stash of material that was too small to do much with, but too big to throw away (in my opinion, anyway!).


This green basket was the original prototype for the Boxy Fabric Basket.  It was the first one I made using the pentagonal pattern pieces.  After I made this one, I decided I wanted side handles instead and started dreaming of a way to use piping.  This fabric was from a bag that a table cloth and cloth napkins came in that my mom had bought a few years ago.  She didn't want to keep the bag as storage, so she gave it to me to make something out of.  I paired it with some black cotton and decided it would be a cute basket to store her cloth napkins in.  Mom agreed, so I'm going to send it to her next time I get off my lazy butt and make it to the post office.  (I have SUCH a talent for making perfectly even things look completely lopsided in photos, so just trust me that the basket is not nearly as wonky as it looks in this photo.)


This next basket has been claimed by Charlotte to hold her "sewing kit" (scraps of fabric that she has fallen in love with, my extra seam allowance ruler, some dull scissors, and my old tomato pincushion filled with bent pins).  It's a little bigger than the final version of the Boxy Fabric Basket, and the handles are sewn on a bit differently.  I'm not sure why the peach fabric looks so orange-y in this photo.


This final Boxy Fabric Basket will be given to one of my children's teachers for Valentine's Day.  I have no idea why this fabric photographs so blue when it's really quite green.  I'm sure it has something to do with my crappy photography skills.  The inside fabric is from a cute chevron fat quarter I bought on a whim once.  I wanted to use red cotton webbing for the handles, but the only red the store had was way more orange than the piping that I had already sewn in.  Whoops.  The white handles look okay though.


This Weaved Fabric Basket (shouldn't it be "woven"?) was very tedious to make, but it was a fun challenge.  Once I got about halfway through the project I went rogue and finished it off my own way.  I also decided I wanted to add handles, so I grabbed some leftover cotton webbing and went to town.


I used four different pink fat quarters and paired them with some teal cotton (which looks blue in these photos for some reason).  There is Peltex inside the pink strips to give the basket some structure, but I think if I made this again I would also add Peltex to the teal strips as well.  I'm assuming the directions meant that I should use Peltex, but it just specified "interfacing".  It looks like Peltex in the photos though.  I reeeeeeeeally wish tutorials would specify better what weights of interfacing are required.


And finally, I made another Quilted Wine Tote for Corey to give to his new co-worker, Logan, when he visited him in Louisiana last week.  Corey also wanted to give Logan a pleather keychain like the ones I made for Corey's Lincoln keys.  I was happy for another opportunity to use my new walking foot, so I jumped at the chance.  The foot worked like a charm for the tote, but I didn't think it handled the pleather as well as I had heard it would.  I switched back to my old technique of covering the underside of the presser foot with masking tape and that did the trick.


Thursday, December 11, 2014

Christmas wine bags and other gifts

My husband has to give some coworkers a little something for Christmas, and I couldn't just let him buy a simple bottle of wine for each of them.  OH NO.  I needed to pipe up and volunteer to make some cute wine bags to make that present a little cooler.  (What I really needed to do was keep my mouth shut and focus on sewing presents for people I actually know and love.  But I did have fun making these, I promise.)


The first couple I made based on a fun little tutorial for "Wine Jackets" from the awesomely named blog Clever Charlotte.  When I made the black one I strayed from the tutorial a bit (because I was too lazy to reopen it and I tried to wing it) and that's why that zipper is a little wonky.  I doubt anyone but me would have noticed if I hadn't pointed it out though.  (I think they might need some charms dangling from the zipper pulls if the recipients of these wine jackets will be women.  I'll have to check with Corey to see who is getting which ones.)


For the next two, I used the Quilted Wine Tote tutorial from Needle and Spatula.  I strayed from the tutorial in only one way -- I used only one layer of fusible fleece instead of two layers of traditional batting.  I took her recommendation to cut the pieces slightly narrower to get a tighter fit on the wine bottle, and they turned out great.  I think these are my two favorites of the bunch.  Binding that tight opening at the top of the bag was a bit challenging though!  If I made one of these for myself (which I would like to do once the Christmas present sewing madness if over) I would make it a little bigger (to the original specifications in the tutorial) so it would fit any type of wine or champagne bottle.


For the next three, I used a simpler tutorial from Ellison Lane for a Wine Bottle Bag.  I originally thought that there was binding around the top, but it turned out that it was just the lining showing where you folded it over to finish off the raws edges at the top.  I love it -- the binding effect without the headache of actually binding!  So perfect.  The green and black ones in the background were sewn exactly to the specs of the tutorial.  For the green striped one in the foreground, I added a layer of fusible fleece to the exterior (minus a bit at the top where it was going to be folded over at the end) and I love that one the best.  The others are nice, but the padded one feels a bit more substantial and looks fancier.  I also put the ribbon for that one a tad lower and I like that look better.


For some of the various teachers in my children's lives, I sewed some matching tissue pack covers and Chapstick holder keychains.  (I also made one more of the Chapstick holders for my friend, Ivette, to give to her daughter's teacher, but I forgot to photograph that one before I gave it to her.)


I completely neglected to post about the original Chapstick holder I sewed for myself last month.  In this dry midwest winter, I am completely addicted to lip balm.  It looks rather adorable alongside my Michigan State Police bottle opener gun that my sweet friend, Kym, gave me when she worked there.  Nothing says class like a gun bottle opener on your keychain, right?  Hee hee.  The Chapstick stays in that little pocket surprisingly well, so this may become one of my go-to quick gifts to make for other women on my list this Christmas.


Saturday, September 13, 2014

Corey's keychains

A new job for Corey meant the opportunity to get a company car!  For someone like my husband, getting to add to his fleet was like Christmas.  The funniest part was that he had to choose only from cars that had parts made by his company, and no one seemed to have a comprehensive list for him to peruse.  You would think H.R. would maintain a list of something like that, but apparently not.  It was hilarious how long it took him to get a lineup of the authorized vehicles.

He finally settled on a Lincoln MKZ, and he loves it to pieces.  It came with all sorts of fancy features like a push-button start -- the darn key just needs to be somewhere inside the car.  The key isn't even a traditional-looking key.  It's just the fob part.  And for someone who usually doesn't carry a whole ring full of keys, this fob might be pretty easy to lose.  He asked me to make something like my keychain, and I made these (one in brown and one in black):


Here is a side view:


Tutorial?  Pattern?  I didn't need no stinkin' tutorial or pattern.  I just took a three-inch wide and eight-inch long piece of pleather, folded it lengthwise in thirds, and triple-stitched along the edges and down the middle.  Easy peasy.  I did make sure I put masking tape on the underside of the foot, selected the "leather/vinyl" setting on the machine, and used a denim needle.  It went a lot smoother than I even imagined it would to be honest.

Next, I trimmed the ends a bit, folded it in half width-wise, and grabbed a Dritz Key Fob Hardware Set (it was $2.79 at Jo-Ann's, but I had a trillion coupons and probably got 40% off or something).  Once I located Corey's rubber mallet, I pounded that puppy closed.  I repeated the process with the other pleather, and then I had two cute keychains.  Took me about 10 minutes total to prep the machine, thread the bobbin, cut the pleathers, stitch, trim, and hammer.  Made me wonder why I had put the whole thing off for so long.

I just realized I never posted a photo of the keychain I made for my van.  I also have one of those funny keys that has no metal part, but this one you actually have to stick into the steering column like a key.  I made keychains like these for me and my friend, Kym, and they are a bit longer so they can go around your wrist if you like.  I chose the fabric so it would match my Michigan mitten keychain that my sister-in-law gave me last Christmas.

Sunday, January 19, 2014

The complete diaper bag ensemble

I had a bit of fabric left over from Toni's diaper bag, so before I sent it to her I made a couple of little extras to stash in her bag if she so chooses.  We have grand plans for a cool coordinating changing pad, but I'm going to have to pick up a bit more fabric for that next time I'm at the fabric store.

Toni's Diaper Bag Accessories


First, I made a sweet little lined drawstring pouch by following a tutorial from Threading My Way.  It would be the perfect size for a couple of pacifiers or some small toys.  I didn't have anything specific in mind when I made it -- I just didn't have any good coordinating zippers on hand and wanted to make some sort of cute pouch to match.

Toni's Diaper Bag Accessories


I made this coordinating keychain to hook on to the loop inside of the bag.  I didn't follow any specific tutorial (though there are loads of them out there for very similar keychains).

Toni's Diaper Bag Accessories


I'm sticking the whole ensemble in the mail on Tuesday morning while Peter is in preschool.  It will be on its way to Aurora soon, Toni!

Toni's Diaper Bag Accessories


UPDATE!!

Toni sweetly sent me some photos of her diaper bag all loaded up with her goodies!  She wanted to show me how there is still tons of room left even filled up with all of the necessities.  The green and tan bundle there is actually a diaper clutch I made her last winter right after Alex was born.


Toni was especially thrilled to discover that the floating inset pocket holds not one, but TWO sippy cups.  Woo hoo!


Toni also reports that even fully loaded, the bag is still a lot lighter than the store-bought ones.  Score!!


Featured at: Threading My Way

Monday, September 9, 2013

Ellie's Car Kit

This weekend we are going to celebrate the birthdays of six different family members on Corey's side of the family.  September is the birthday month for not only Corey, but also for his grandma, his mom, his dad, his uncle, and his cousin, Ellie.  Corey, his mom, and his uncle all share the exact same date as a matter of fact.

For Ellie's seventeenth birthday, we wanted to make a car-themed gift since she is now the proud new owner of a super cute Jeep Liberty.  Corey and I put our heads together and came up with this collection for her, which I am calling "Ellie's Car Kit" for lack of better inspiration.


The trash bag is designed to hang on the gear shift.  If she prefers, she could hang it on the head rest instead.  It's lined with ripstop vinyl, but I'm still going to warn her not to put anything full of liquid in there.  Theoretically the bag should be washable, but who knows how it would survive the wash.  The tutorial calls for putting a cylinder of Peltx inside to serve as a support for a trash bag liner, but I doubt a seventeen-year-old would really use one.  The purple fabric is just quilter's cotton that I found in the remnant bin at Jo-Ann's earlier this summer.  [This is actually the second time I have made this car trash bag pattern, but I gave away the first one before we had this blog to document our projects.]


I have blogged about this cool Wide-Open Zipper Pouch before.  It was still sitting in my sewing room as I was picking fabric for the kit, and it suddenly hit me that it would be perfect for holding some first aid supplies for the new driver!  Actually, Corey insisted that Ellie needed first aid supplies for her car.  I rolled my eyes and told him he was an idiot, but I went ahead and bought a basic kit anyway.  It was only after I made the happy discovery that this pouch would fit the supplies perfectly that I warmed up to the idea.


The supplies came pre-packaged in some plastic, and it all fit nicely inside the pouch.  I hope Ellie doesn't ever need anything out of it except for a band-aid or two.


Just for fun, I put a little silver bell on a jump ring and attached it to the zipper pull.


Corey had a great idea for me to make a clear vinyl window pouch to hold the car's registration and insurance cards.  Actually, he really wants me to make one for him, but I haven't quite gotten around to it yet.  This Peek-a-Boo Pencil Pouch is a great size to store all of the vital info Ellie will need to carry in her glove compartment.  It's hard to see in this picture, but I put the same silver bell as above on this zipper pull as well.


We figured Ellie might need to carry a pack of tissues with her, especially since winter is coming up soon.  Where she lives in northern Michigan, winter usually skips right over fall.  Finally, I just whipped up a little keychain (and it really is little -- I didn't have a long enough piece to make it fit over a wrist, but with the little clip on it she can just hook it onto something else instead) not based on any pattern in particular.   The black part wrapped around the strap is a little bit of grosgrain ribbon I had on hand.


Fun fact -- the denim in the tissue pack is a scrap from Connie's old dog bed that I had made years ago when we lived in Tennessee.  The pillow insert disintegrated and I never bought another one.  The dog bed case got shoved in the linen closet and when I found it during the move to Michigan I stuck it in the scrap fabric bin.  The black is more of the ripstop vinyl, and the green (which is also in the clear vinyl pouch above) is left over from making Erin's purse.

Happy birthday to Ellie (and the rest of Corey's family!).

Wednesday, May 1, 2013

Really really long post of Niki's past projects

Don't hate me because I have a pathological burning need to be complete in documenting my sewing adventures.  Holy cow, I really DO keep Jo-Ann Fabrics in business . . .

Oh my gosh, tissue pack holders are crazy fun to make.  I made the one on the top from this tutorial, and the one on the bottom from another one that I have since deleted off my Pinterest board because I liked the other one so much better.  The bottom one is totally lame compared to the top one.


Here is another one of the cool kind.  It's a great way to use up tiny scraps from old projects.


I love love love this sewing caddy.  I obviously don't use it for carrying sewing supplies, but I totally could.  It features pockets on the inside AND on the outside, and was fun to sew.  The handles are floppier than I would like, but I can't remember if that is because I didn't follow the exact instructions.  that is always a strong possibility since I usually just use what I have on hand rather than running out to buy the exact brand and type of interfacing or weight of fabric.


I'm using the caddy to hold all sorts of other little goodies I sewed.


Like this really lame camera case for Charlotte's camera!  Early last year, I got all ambitious and tried to quilt some material and wing some little bags for Charlotte's and Sonia's new cameras.  I learned two things: (1) quilting needs a walking foot and is a lot more complicated than throwing together a sandwich of fabric and batting, and (2) I needed a lot more practice actually sewing bags before trying to design one myself.  In fact, at this point, I don't think I had discovered online sewing tutorials.


The very first online sewing tutorial I followed was for a "Car Cozie" (a car caddy to bring to restaurants, doctor's appointments, etc. to hold cars and provide a street for them to run the cars on).  I fell in love with them and made something like 14 of them by the time the summer was over (for all of the cousins, friends, and even one for Corey -- per his request).  I made this one for Charlotte:


And this one for Peter:


This is what it looks like all rolled up so you can throw it in your purse:


Since the car caddy was such a huge hit, I followed another tutorial (that I have since deleted because the directions were cruddy) to make all of the kids crayon caddies (they roll up in a similar manner, but I didn't take a picture of one all rolled up for some reason):


This diaper caddy (Do you see a theme?  I seem to like caddies . . .) worked out great until Peter got (sort of) potty-trained last month.  Now it's waiting to find a new use.  Too bad I can't find the tutorial I used for this one, either.


At some point, I discovered what I thought was oilcloth in the remnant bin at Jo-Ann's.  I made Steph and myself "wet bags" (thought the tutorial calls them "grocery totes") to bring wet bathing suits home from the beach in last summer.  Turns out, this is really some sort of cross between vinyl and oilcloth, and I have yet to figure out the exact name.  It's found in the utility fabrics section.  This was my first round-bottomed bag, and it was fun to see how it all went together:


I winged this tote to give Peter a little bag for carrying around his treasures.  Turns out he's not as interested in doing that as Charlotte is, but he certainly likes the bag.  I brought it with me filled with Peter's car caddy and crayon caddy when I needed to entertain Peter during Charlotte's ballet classes:


This Olivia Bag was fun to make, but turned out smaller than I had imagined.  I also had a rough time with the top stitching, never really fixed it, and just gave up on it after Erin crocheted me my awesome new purse.  I loved that the tutorial taught me how to do an internal zipper pocket, though!


All last fall, Erin and I carried these purses that I made out of my old jeans.  I found a couple of tutorials on the web for jeans purses and hated that they had stupid things like raw edges inside and really thin bottoms, so I used the skills I had learned from making a bunch of other bags and to sort of design this myself.  I made a few more of them from Charlotte's old jeans and cords and they turned out even cuter (since her butt is so much smaller!).


This winter, I bought some Insul-Bright and went a little crazy making potholders for a while.  This "oven hand mitt" is the one I made that I liked the best.  I'm kicking myself for not taking pictures of the cool one I made for Jordan or the Star Wars one I made for his friend (to match the aprons I made for each of them, too!).


This fun little "fabric box" turned out to be perfectly-sized as a pencil holder.


Here is the super cool purse Erin crocheted for me.  I sewed the lining for the purse based on this tutorial, and I used the wrap from Erin's bridesmaid dress for Ali's wedding as the fabric!  Erin had given me the fabric ages and ages ago. and it works perfectly as a purse lining.  I also sewed the little fabric key chain to match the jeans purse that I used to carry, but it still looks cute with the crochet purse.


Here is another one of the snappy bags.  Fun fact: I got in huge trouble with Corey when I cut up his nicest tape measure to use in it.  Whoops.


I adore adore adore this dumpling pouch.  The fabric is cute, the pattern was fun to follow, and it holds a surprising amount of stuff in my purse.


I have sewn some pretty superfluous and unnecessary things just for the fun of it, but this may take the (cup)cake.  It's a cover for my checkbook.  I made the not-cut-on-the-bias tape myself, which is awfully cute in the strawberry fabric.


This little boxy zipper pouch was great to make, but it's unlined and you just can't zigzag enough with a regular sewing machine to get the raw edges inside to look good.  I have since found tutorials for lined box zipper pouches, and would choose those tutorials instead next time I make one.


I made this tablecloth and the set of cloth napkins for Charlotte's tea parties.  I sewed them over a year ago (before I discovered the wonders of online tutorials and the effect of the grainline in fabric) and they're a little bit funky as a result.  I designed it myself and couldn't have done a worse job.  Please don't look too closely at any of it.


This is my denim scrap basket.  Charlotte loves looking through my old scraps, and I need to come up with some sort of project for her to use them so they don't overflow!


Now THIS is actually oilcloth (aka laminated cotton).  Once I finally buy some more bright green thread, I will finish topstitching around the edges of them and will have some great kid-friendly laminated place mats for the summer!


Here is the backside (a great heavy oilcloth I found on my pilgrimage to Haberman Fabrics in Royal Oak):


I made these curtains for Charlotte's room back in 2009.  They are actually two separate valances (because her old room had two skinny windows) squished together on one rod to fit the big window in her new room.  The buyers of our house in Tennessee had checked the option that they wanted our "window coverings" which technically included the valances, but since I was pretty darn sure the buyers didn't actually want my hand-made crap, I left them a stamped, addressed envelope for them to mail back to me any of the valances they didn't want.  They sent back these, the ones from Peter's room, and the ones from the bonus room, but they didn't send me back the valance I REALLY wanted -- the cool tab topped one I had made a decade ago and still adored.  Wah!


My great pillow sham piping experiment turned out better than I feared when I made Charlotte these two throw pillows for her bed.  The purple one actually has a zipper closure!  Too bad I only had a black zipper on hand and was too anxious to finish the project to wait until I had a matching zipper.  Charlotte really loves the one with the heart applique, and insisted on sleeping on it instead of her real pillow for several weeks.


This dresser scarf was made to match Charlotte's valances and to test out the decorative stitches on my new (well, it was new then) Brother sewing machine.  It was made out of my own imagination, before my imagination knew about things like batting and quilting.


I actually took an old t-shirt of mine and downsized it to fit Peter!  I used Dana's tutorial for the pattern and technique of putting it together, but cheated by using the hems off of the original shirt sleeves, hemline, and the shirt's original neck binding.  I really should have rebound the neckline because an adult t-shirt neckline has too shallow of a curve.  The shirt is a little funky, but Peter doesn't care.


This diaper caddy has been transformed to an underwear caddy now that Peter is sort of potty trained!  Petey can't reach his underwear drawer, so I put his undies in this in his closet since he needs to change them so often.  Ahem.


I used the method of putting in a waistband a la the circle skirt, but the bottom part (recycled from some old t-shirts, is not a circle.  The skirt is NOT super flattering on me, but Corey loves it because it has the Michigan State logo appliqued on it.


This little tote bag was a blast to make.  I cut the pocket off of one of Corey's old shirts and it looks hilarious on there.


This pleated tote looks huge, but doesn't really hold a ton because it's flat.  It was a fun introduction to pleats, though!  After I made it I decided I hated the fabric, so it hasn't been used that much.


This tote has has been really handy.  Who knows where I found this original tutorial, because I can't find it anymore.  The tote has six pockets on the outside and I really love the stripes.  I want to find more of that material to make some more stuff.  That's the problem with always buying remnants -- yes they are 50% off, but they also are hard to ever find again!


This is Petey's other cape (made from a pattern created in my own little pea brain).  It was not the original one -- that one was quickly destroyed because I made it out of my high school graduation gown, which was some crazy thin man-made nasty material.  I salvaged the "P" applique and reapplied it to this new cape.  The blue nylon fabric was from an old laundry bag that had never been used much.


This pleated zippered pouch is of my favorite pouches ever!  I use it every time I travel.  The pleated pouch tutorial is really well-written and easy to follow.  The striped fabric was left over from some valances I made for Erin's apartment when she was first married.


Finally, this is the wardrobe I made for Charlotte Doll for Charlotte's birthday.  This "Katie Dress" was my first dress that has a bodice!  It has a zipper in the back and my first use of piping in a fashion sewing project.  I got the skirt's pleats all wonky when I sewed the skirt to the bodice because that darn polyester does NOT like to hold a pleat in place, no matter how much you iron it.  Yes, Charlotte Doll's hair is all wonky because I was practicing different types of braids and didn't bother to restyle it for the photo shoot.


Charlotte doll also needed her own pillowcase dress.  I figured Hello Kitty fabric was a good choice, but it doesn't do much for Charlotte Doll's figure.  Hee hee.


My first experiment in shirring!  The bias tape along the top is kind of lame, so I would skip that step next time.  The straps Velcro closure in the back.  The top and the matching tote were made from my little pea brain.  Now Charlotte Doll needs some coordinating shorts!


Auntie Ernie crocheted this awesome top, and I made a teeny circle skirt to match.


My first attempt at a t-shirt for Charlotte Doll was a disaster.  This is take #2, and despite the fact that it looks like a mock turtleneck (barf!), the rest of it worked out well.  The back has a Velcro closure.  The tutu underneath is just a circle skirt stitched to 1" elastic for the waistband.