Erin has officially sewed her first solo project on the sewing machine I handed down to her (a lining for a bag she crocheted for her friend, Toni), so I figured I had better make her a cool thread catcher to keep by the sewing machine. After I made the thread catcher, I wanted to try making a bigger one to hold other sewing notions and I figured I might as well type up a little tutorial in case I ever want to make one in the future. I even used fabric with Notre Dame's colors in her honor -- she and her husband both have two degrees each from ND!
I have an awesome thread catcher/pincushion combo that my amazing Aunt Janet made for me, but since Erin already has a pincushion (and adamantly denies needing another one, even though I doubt you can ever have too many!) I didn't need a design quite this complex. Isn't it cool, though?
Aunt Janet is so amazing. Someday I hope to have half of her sewing abilities! Anyway, here is what I came up with when I sat down to design a little something for Erin. It's really simple, so this might be a good project to make with Charlotte when I start teaching her to sew someday.
Thread Catcher & Notions Basket
Materials needed:
- Less than one fat quarter of main fabric
- Less than one fat quarter of coordinating fabric
- Felt (or other batting of choice such as fusible fleece)
- Basting spray (unless you are using fusible fleece)
- Extra wide double fold bias tape (about half a package)
- Thread to match the bias tape
I always hate it when tutorials don't really specify what type of fabric was actually used in the project, or don't give recommendations for such. I used a couple of quilting weight cottons, but I bet this would work with just about any type of fabric other than something super heavy weight/bulky or something ultra lightweight/sheer. I love the Riley Blake chevron fabric that I used -- I actually won it from a giveaway hosted by Sew Spoiled of fabric from All Stitched Up by Angela.
STEP ONE: FABRIC CUTTING AND ADHERING TO THE FELT/BATTING
First of all, decide which size of basket you would like to make -- the thread catcher (the smaller one) or the notions basket (the bigger one). The finished dimensions of the interior of the thread catcher basket are 4" x 4" (not including the wings), and it is about 1.5" high. The finished dimensions of the interior of the notions basket are 6.5" x 6.5" (not including the wings), and it is about 2" high.
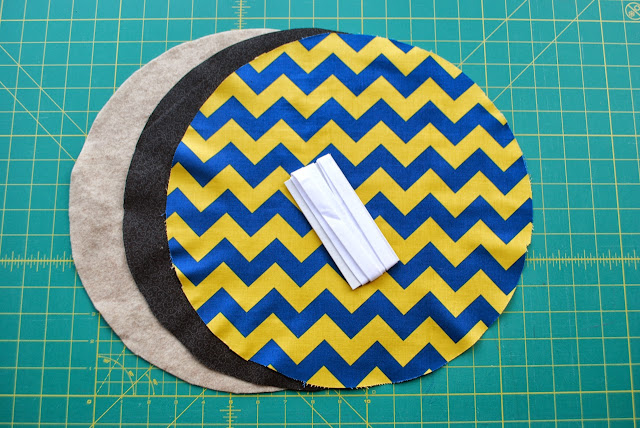
For the thread catcher, cut your main fabric, coordinating fabric, and felt/batting in the shape of a circle with a 10.5" diameter -- it was the size of one of my dinner plates. For the notions basket, cut it all in the shape of a circle with a diameter of about 14" -- this is the size of one of my serving platters.
I used my favorite quilt basting spray to adhere the felt to the wrong side of the main fabric. Remember to spray the glue to the felt rather than to the fabric.
Then I flipped it over, sprayed the other side of the felt, and stuck the coordinating fabric (the black) wrong side down onto it. The end result should be a nice little sandwich with the fabrics facing right side out.
You could totally use double-sided fusible fleece for this, or you could use traditional quilt batting. I like the stiffness of the felt and the added body it gives the basket. Adding some quilting would give the basket some nice texture, but I didn't do that this time. Next time, maybe!
STEP TWO: BINDING THE CIRCLE
You definitely don't need to use prepackaged bias tape, of course. I do like using homemade instead, but since I had some of the prepackaged stuff on hand I just used that. Here is the method I like best when using the prepackaged bias tape.
First, open up the tape and lay it with its right side facing the right side (the one with the main fabric), lining up the raw edges. Usually, bias tape has one side with a shallower fold than the other side -- if it does, put that closest to the outside. This bias tape didn't for some reason.
Fold about a 1/4" of the tape up (see photo) and begin sewing in the outermost fold.
Sew all the way around the circle, taking care to keep the edge of the bias tape precisely even with the edge of the main fabric. Here, for some reason my coordinating fabric circle turned out a tiny bit bigger than the main fabric, so I trimmed it down to size before I folded the bias tape around.
When you get to the beginning of the circle, overlap the bias tape and sew over the original about 1/2" or 3/4". Do a lock stitch and cut the threads.
Clip off the excess tail of the bias tape (and trim any wide spots in the coordinating fabric!).
Fold the bias tape around to the back side of the circle and give it all a little press with the iron. Make sure the place where the ends overlap looks neat and tidy. I also pin it all down to make sure it doesn't shift when I do the next step.
From the right side (the side with the main fabric), sew near the inside edge of the bias tape. Periodically peek around to the back side to make sure you are catching the bias tape on the backside. If you're not, shriek in frustration while you rip it out and resew with a slightly more generous seam allowance.
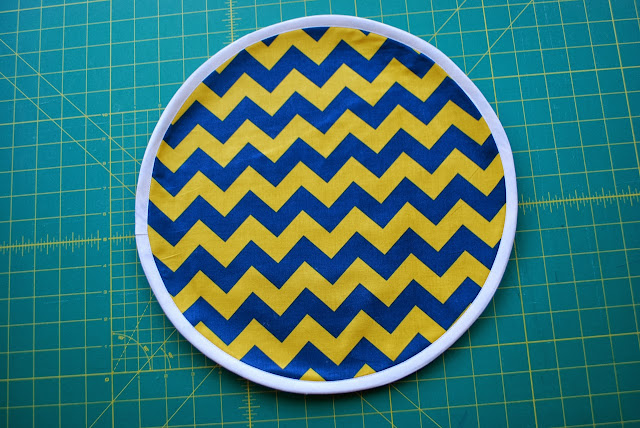
Here's how it should look from the front side. I forgot to take a picture from the back, but ideally it should look pretty much like this from the back as well.
Now you have a lovely bound circle. Mine kind of curled up at the edges, but that doesn't really matter.
STEP THREE: CREATING THE BASKET SHAPE
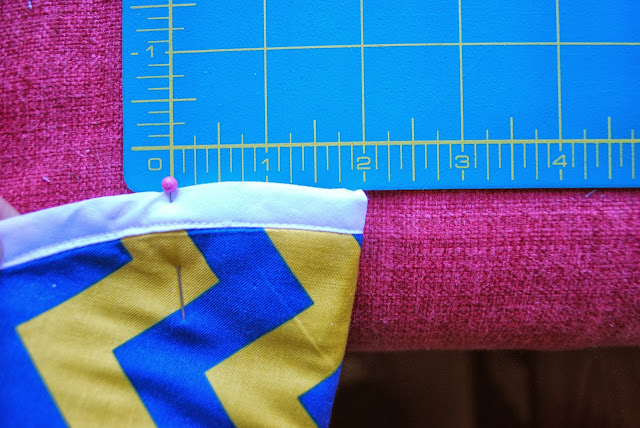
Fold the circle in half with the coordinating fabric on the inside. If you're making the larger basket, measure 2" up from the bottom "corner" and pin the layers together right on the bias tape. Repeat on the other side.
If you're making the smaller basket, then pin the layers together 1 1/2" from the "corners".
This is what it should look like now.
Open it up and pinch it back together in half the other way with the pinned places matching together in the middle. Pin the other two "corners" together at the two-inch mark like you did above.
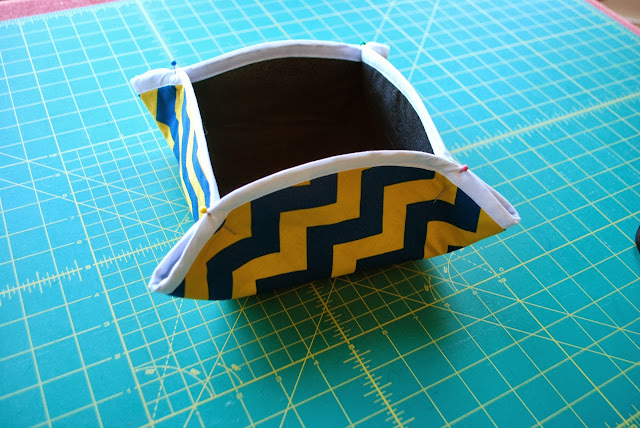
Here's what you should have now -- it's starting to look like a real basket!
Sew right where each of the pins were a seam perpendicular to the bias tape, only as long as the width of the tape. Yeah, white stitching on white bias tape is not so easy to see, but my messy lock stitches are right there in their full glory.
Once you have sewn all four of the "corners", it should look like this from above:
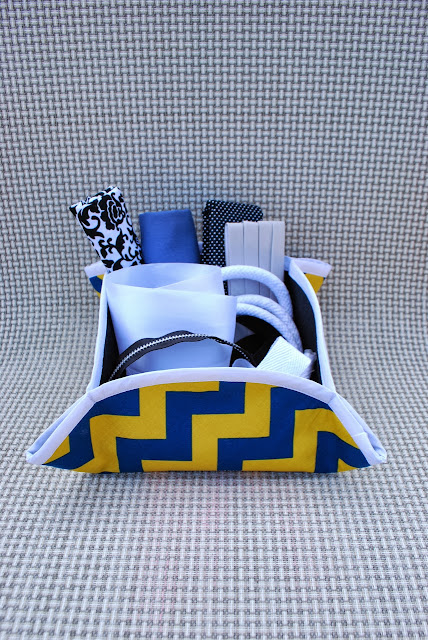
Stuff the basket full of some cute notions and you're in business!
Here is the notions basket with its little buddy, the thread catcher.
My sister has assured me that she is not looking to pick up sewing as a full-blown hobby, but she loves the idea of being able to line the bags and pouches that she crochets. Then, she tell me that she is going to sew her daughter, Sonia, a Princess Leia costume for Halloween. Bon voyage!
Tutorial for personal use only, please.
Featured at: A Jennuine Life, And Sew We Craft, Craft Gossip, Sewistry, Go To Sew, Feather's Flights, Threading My Way (and again!), Totally Tutorials
Linking up to: The Stitchin' Mommy, Craftberry Bush, Life After Laundry, A Jennuine Life, Gingerly Made, Nap Time Crafters, While He Was Napping, Nap-Time Creations, Threading My Way, Today's Creative Blog, Flamingo Toes, Scattered Thoughts of a Crafty Mom, Creating My Way to Success, USS Crafty, Sew Many Ways, Sew Can Do, Sumo's Sweet Stuff, Go To Sew, Feather's Flights, Nap-Time Creations, Adventures of a DIY Mom, Sew Crafty Angel, Ginger Snap Crafts, Sew Much Ado, A Creative Princess, The Princess & Her Cowboys, Life After Laundry, Sewlicious Home Decor










I'm over from SewManyWays. Thanks for your lovely tutorial.
ReplyDeleteBRILLIANT tutorial Niki! So clear and well explained. I love this little basket and I am SUPER impressed by your binding - I wish mine was even half as neat as yours!
ReplyDeleteThanks for linking to a Round Tuit!
Hope you have a fabulous week!
Jill @ Creating my way to Success
http://www.jembellish.blogspot.com/
Thank you, Jill! Ha ha -- I can tell you my binding rarely looks this good. I think the sewing gods were kind to me because I was photographing for a tutorial. You know you are my inspiration for all the tutorials, so every one I post is thanks in part to your guidance and encouragement! :)
DeleteHi Jill,, A "Round Tuit" ??? what is this a blog site or a project,,,thanks for your help,,,please email me,, LJeterpudd@aol.com Subject: ROUND TUIT....
DeleteThese little baskets are just perfect. I could use a lot of them. Thank you so much for sharing this with the Less Laundry, More Linking party. Pinning this to our party board. I love all of your sewing projects. I'm definitely going to check out that thread catcher too.
ReplyDeleteI'm with Jill-- great binding job! I've seen these done with rectangles but never with a circle Looks great! I'll be featuring on www.sewistry.com soon!
ReplyDeleteThank you Palak! Thank you so much!!
DeleteYour basket grabbed my attention when I saw it on Craft Gossip and your tutorial was excellent. Very explicit, easy to understand and great pictures. I liked your comment on the lock stitches. Me too, still can't find a way to make them invisible. Thanks a bunch.
ReplyDeleteCute fabric! I should make one of these for my thread, but I'd probably be horrible at actually putting thread in there. At least it'd be cute right? Great job!
ReplyDeleteHopped over from the Showlicious Link Party. I love these! What a clever and easy little project! I hate having to drag the trash can over to my sewing spot. This catch-all is perfect. Thanks for sharing! I will be pinning this on my to-do list!
ReplyDeleteA great little basket, Niki!!! Love the royal blue and yellow together and your stitching is so neat and even.
ReplyDeleteAnother great Tutorial, just in time for Christmas gifts.. woo hoo, now a notions caddy, a thread catcher and a Fabric Box,,now my daughters and granddaughters will be Happy, Happy, Happy,,,(but they won't be using the items as we would use them)
ReplyDeleteThanks again,
Linda LJeterpudd@aol.com