Thursday, October 31, 2013

Erin's Owl Lunch Bag

I made Erin this lunch bag a few weeks ago and threw it in a package I was sending to her as a surprise.  So, although I took photos of it, I held off on posting them until she opened the package.  Then, I totally forgot I had taken the photos until yesterday.  Sheesh.  I'm lucky I remember to do anything anymore.


Anyway, this was the second lunch bag I have made using Ayumi's awesome tutorial (the first was Corey's Spartan Lunch Bag for his birthday).  The brown parts are duck cloth left over from Larry's 5-Gallon Bucket Organizer and the rest of the fabric are cute fat quarters I picked up at Jo-Ann's.  The cording is more of my favorite parachute cord, and I used felt for batting.  The original tutorial doesn't call for batting, but it also calls for the bag to be made from canvas instead of quilting cotton.  I also figured the felt would give it a bit of insulation.  I just scored a remnant of Insul-Brite a few days ago, so I'm going to have to try to make a lunch bag for myself with that at some point.  Maybe I'll even use the oil cloth scraps I have.  Ooh -- If I didn't have two school Halloween parties to attend today, I would totally be sewing that.

Here is the view from the top.  Yet again, this is one of those projects that turned out so cute that I hated to give it away!  Guess that means I need to make me one.


_______________________________________________________
Linking up to: ChrisW Designs

Sunday, October 27, 2013

Emergency Snickers Ruffle Zipper Pouch

Corey's mom has had a rough few weeks (her dad is in the ICU after a triple bypass) and he figured she needed something to hold an emergency stash of chocolate in her purse in case she needed a little pick-me-up after a long day at the hospital. He and I looked through the pouch tutorials I had pinned on my Pinterest board (yes, he was amused by the sheer number of them that I have pinned) and we picked this one from See Kate Sew as the perfect Snickers repository.


It's teeny -- just big enough for two or three fun-size Snickers bars.  I stuck fairly closely to the tutorial (other than completely skipping the decorative stitching), but I changed it so the top section above the ruffle was the same as the bottom fabric (rather than the same as the ruffle) -- I just liked the ruffle to stand out more on its own.  I also boxed out the bottom corners (just a tiny bit) just for fun.  Okay, so I guess it wasn't THAT close to the original instructions, other than the structure of the ruffle and the size of the pieces I cut.


The lining is the same print as the ruffle, and I added a little metal ribbon charm to the zipper pull to give the pouch a bit of extra cuteness. It's been hard on the whole family having Grandpa Great (as my kids call him) so sick, but since I'm sick with an icky cold and therefore banned from any ICU visits I'm glad I could contribute somehow by keeping my mother-in-law's spirits up.  Now we're off to the store to buy a stash of Snickers, because, as my husband loves to remind me, chocolate is an excellent antidepressant.  

Saturday, October 26, 2013

Toni's Purse and Purse Lining

Look out, world-- Erin is starting to sew!  Inspired by my success with lining the shark pouch, I promptly took my hand-me-down sewing machine home, stuck it in the basement, and ignored it for several months.  Yep.  IGNORED IT.  I was so scared!  I thought I would just ruin any project I tried.  Or, worse yet, I'd do just fine and become hopelessly addicted to sewing (like Niki).  I already have one crafting addiction; I don't need two!

But, I had promised my lovely friend, Toni, that I would attempt to line the purse that I crocheted for her this past spring.  The purse was a "UFO" (unfinished object) that Niki handed down to me in February (along with a ton of yarn).  Niki found the free pattern hanging in an aisle of Hobby Lobby a bunch of years ago, started crocheting it, and then abandoned it not long into the project.  It uses pretty, shiny nylon cord/yarn, and as I found out soon after I vowed to finish this UFO, that pretty, shiny nylon cord/yarn is reeeeeeeeally painful to crochet with.  There is no stretch, it's kind of stiff, and in order to get the stitches tight enough so that there aren't huge holes in the work, you have to pull the stitches really hard.  You can't just use a tiny hook to make smaller stitches because cord simply won't crochet as tight as yarn.  Anyway, I powered through the project, gave it to Toni, and happily threw away the cord remnants when I finished the purse.

After Niki taught me how to sew on her old machine, I again made a vow, this time to line Toni's purse.  She gave the purse back and donated a pillowcase to the cause to be used as the lining.  Several months later, I summoned my courage, and voila!  Here is the inexpertly-lined purse:


Toni wanted to wear the strap across her body (kind of like a messenger bag), so that's why the strap seems a wee bit long.


Here's the first lining that I sewed, which turned out too small.  I went rogue and tried to design my own lining, but it ended up a tiny bit too small.  Laid out on top of the purse, it looked like it would fit, but when I went to hand-sew it into the purse, it just didn't work.


So, I used this crocheted purse lining tutorial and the second attempt went way better!  It's hard to take a good picture of the lining of a purse....  The picture may be bad, but the tutorial was perfect and I consider this lining to be a pretty darn good one!


My next sewing post will be to show off the Princess Leia costume I made for my daughter....  Spoler alert: it went shockingly well!!  Oh my.  Niki may have created a sewing monster.

Maisie's Spooky Skirt

I made my sweet three-year-old niece, Maisie, a spooky skirt also while I baby-sat her last week.  She was hilarious when I showed her the skirt as a work-in-progress.  "Is dat fo' ME?  It IS spooky, Aunt Niki!"  I had to bribe her with M&Ms a couple of times to get her to try it on for fittings, but all in all she was a good "client".  Here's a shot my sister-in-law, Stephanie, sent me of Maisie wearing it a couple of days later.


That girl is even cuter in person, believe me!  I'm so jealous of that kitchen backsplash.  Maybe someday . . .

Then, a few hours later, I got a text from Steph asking what the washing instructions were for the skirt. Apparently, there was a pee accident involved -- whoops!  I was stumped.  This materials is just about as man-made as it gets, so I just wildly guessed that she should wash it on cold in the gentle cycle, but not dry it in the dryer.  I haven't heard back how it went, so I'm just crossing my fingers and hoping it worked.

Thursday, October 24, 2013

An unhappy Batman

I have had a black t-shirt I was planning to appliqué with a Batman logo for Peter for months.  I finally sat down this afternoon and sewed on the logo (cut from garish yellow ripstop nylon) and hoped it would pull Peter out of his funk (caused by a bad cold that kept him home from preschool).

Three-year-olds are not really known for their gracious acceptance of gifts, but I was a little surprised when Peter outright rejected the shirt.  Then, he softened and told me he would want it tomorrow.  A few moments later, he wanted me to put it on him.  Then I tried to bribe him with watching some TV if he let me take a photo of him.  I guess I should have put some shoes on in since it's barely 50 degrees outside, because this was his reaction to the outdoor photo shoot:


"IT'S TOO COWD, MOMMY!  TOO COWD!


Yes, he's still wearing his pj bottoms, because he stayed home sick today and why get him dressed if I don't have to?

I carried my little superhero back inside and tried to catch a few quick snapshots, but he refused to stand somewhere with good lighting.   I think he was telling me here that he was DONE.


I guess this photoshoot just wasn't meant to be.  I really should have used some sort of stabilizer on the back of the shirt because the design was so thin and spread out.  I also don't think the Wonder Under stuck to the nylon very well, so it probably wasn't the best choice for appliqué material.  Peter seems to like the shirt now that I have him safely back inside the warm house with an episode of "Paw Patrol" on, so I guess all's well that ends well.

Friday, October 18, 2013

Spooky Skirt

I was lucky enough to win a great little bundle of fabric from the super-talented Sanae Ishida that included some ridiculously fun rainbow spiderweb tulle and spiderweb flocked tulle-esque polyester.  At the risk of spiderweb overload, I was unable to resist putting the two together for the ultimate Halloween skirt.  Charlotte promptly renamed it her "spooky skirt", so I guess I had better follow suit.


If anyone can pull off a double spider web skirt, it's definitely going to be a girl who was named after a spider, right?

I made the skirt by cutting the bottom layer 17 1/2" by the entire width of the fabric, and the top layer 14 1/2" by the entire width of the tulle.  The tulle ended up being a little wider than the polyester, so I had to cut a few inches off the width.

I turned the hems of both pieces of fabric under twice and stitched the polyester with a straight stitch and the tulle with a zig zag.  Man, that stuff is squirrelly!  Then I basted the two layers together with a zig zag stitch at the top and sides before I sewed it into a tube with a French seam.  I had to take the extra step of basting at the sides because the tulle had a mind of its own.  Then, I made a casing for the waistband and threaded in some elastic.  Easy as pie!  I would totally write a tutorial for it if there weren't already about 8,000,000 other better tutorials for simple skirts on the web.

The rainbow spiderwebs on the tulle are metallic and awesomely sparkly, so I tried to capture the sparkle by taking a photo in direct sunlight.  The skirt is fabulous and will look great with some black leggings (it's already too cold for bare legs!).


Now I'm thinking I need to use the mottled red fabric that was also part of the giveaway bundle to make a fun appliqué shirt to go with the skirt.  I have plenty of fabric left to make skirts for Sonia and Maisie, too, so that will probably be my weekend project.

Here is my little goblin, modeling her skirt (over her corduroys because I didn't have any black leggings handy).  I tried to get her to stand on the ground, but she has decided that she can only properly model something I made for her if she stands on the post on our back deck.

This is her idea of a "sweet pose".


This is her alternate "sweet pose".


This is her "elegant pose".


And finally, this is her "spooky pose".


I don't think Barbizon will be calling any time soon.


Linking up to: Get Your Crap Together, Sew Can She, U.S.S. Crafty, Scattered Thoughts of a Crafty Mom, Creating My Way to Success, Craft-O-Maniac, Sumo's Sweet Stuff, Skip to My Lou, Sew Can Do, Blossom Heart Quilts, Nap-Time Creations, Feather's Flights, Funky Polkadot Giraffe, And Sew We Craft

Tuesday, October 15, 2013

Odessa's Tea Party Purse

Odessa (the daughter of my good friend, Kym, and one of Charlotte's favorite buddies) is one of the sweetest little girls I know.  I have sewed her a few things over the past couple of years, but somehow I never made her a purse.  She asked me very sweetly for one a few weeks ago, and I finally got around to making it this afternoon.


The purse's design came from a tutorial by Fancy That.  I loved how the top was gathered with elastic to give it a ruffly look without having to actually sew on ruffles.  I quilted the outside (using felt for the batting) with diagonal lines because I'm still too chicken to try any other design.

It's the perfect size to store a few of Odie's treasures, and Charlotte and I decided it would be ideal bag to carry to a tea party.


I do wish I had added boxed corners to the bag -- I'm not a huge fan of the pointy bottom and the boxed corners would have helped the bag stand up on its own.  If I make the bag again -- and I probably will, because this would be a perfect addition to a birthday present for any one of Charlotte's friends -- I will definitely box the corners.  I think I would also use cotton webbing for the handles because I love the finished look that gives to a casual bag.  I just can't sew as straight as I want to and when I make the turned tube handles with stitching down them it always looks too home made for my taste.


Linking up to: ChrisW Designs

Monday, October 14, 2013

Frog Mary Jane Baby Shoes (9-month-old size) -- a free crochet pattern

A picture of an adorable collection of crocheted baby mary janes and sandals was circulating the internet last month, and several people brought it to my attention. One of my old high school honor band and band camp buddies, Erin (she has the best name!), asked if I could crochet a pair of the frog shoes for her seven-month-old niece, so I tried to find the source of the picture and locate a pattern. As far as I could tell, the picture was just showing shoes for sale-- not a pattern. So, I decided to come up with a pattern of my own. Voila!


Ok, I'll be honest-- these were my second attempt. The first ones turned out WAY too large. I had looked up the average shoe size of a 9-month-old, but somehow it still all went wrong. The only good part of it is that now I have made up patterns for two different sizes of the same shoes! Not sure who would fit in the bigger ones-- maybe an 18-month-old? Gotta see if I can locate some of my little buddies from playgroup to try on the shoes. I will try to find the time to type the larger-sized shoe pattern up and post it.

I borrowed the sole pattern from the free pattern for some adorable baby Converse shoes (remember, I made a pair this past summer), but the upper part, strap, and frog are all out of my own head.

If anyone uses my pattern, please let me know how it goes!  I'd love to see how yours come out!  Either leave a comment on here or post your project on Ravelry and link to the pattern.

To download the free crochet pattern in a pdf file, click here.

Materials Used:
- US - F/5 hook (3.75mm)
- Yarn needle
- Red Heart Super Saver Yarn (acrylic, worsted weight) in white, green, red, and black
- Small shank buttons (not sure what size-- they were from my stash)
- Pleather (for sewing onto the soles)
- Sewing needle and black thread (for sewing pleather on soles)

Stitches/techniques/abbreviations used:
- st (stitch)
- ch (chain)
- sl st (slip stitch)
- sc (single crochet)
- hdc (half-double crochet)
- dc (double crochet)
- sc inc (two single crochets in the same stitch)
- sc dec (wongle crochet two stitches together)
- hdc inc (two half-double crochets in the same stitch)
- hdc dec (half-double crochet two stitches together)
- dc dec (two double crochets in the same stitch)
- Rd (round), Rds (rounds)
- Join (join with slip stitch to the first stitch of the round)
- Magic Circle (YouTube has great tutorials; you can also just chain 2 and work the number of stitches in the second chain from the hook)
- Working in the “loop behind the back loop”: check out the great tutorial in the pattern at http://www.ravelry.com/patterns/library/crochet-baby-converse. Alternatively, you could just work in the back loop only of the previous round, but it won’t leave a nice border.

Note: Shoes are worked in joined rounds; do not turn work unless instructed to do so.

Basic Shoe:
(with white yarn)

Rd 1: Ch 13, turn; skip first ch, 6 sl st, 5 sc, 3 sc in last ch, rotate 180 degrees; working down the other side of the chain, 5 sc, 6 sl st, join. (26)

Rd 2: Ch 1, sc in joining st, sc inc, 10 sc, 3 sc inc, 10 sc, sc inc, join. (32)

Rd 3: Ch 1, sc in joining st, 2 sc inc, 8 sc, 2 hdc, 2 hdc inc, 2 sc, 2 hdc inc, 2 hdc, 8 sc, 2 sc inc, join. (40)

Rd 4: Ch 1, sc in joining st, 3 sc inc, 12 sc, 3 sc inc, 2 sc, 3 sc inc, 12 sc, 3 sc inc, join. (52)

Rd 5: Working in loop behind back loop (see note above): Ch 1, sc in joining st and around, join. (52)

Here’s a close-up picture of the sole:


Rds 6 & 7: Working in both loops (throughout rest of pattern): Ch 1, sc in joining st and around, join. (52)

Rd 8: Ch 1, sc in joining st, sc dec, 18 sc, hdc, 4 dc dec, hdc, 18 sc, sc dec, sc, join. (46)

Rd 9: Ch 1, sc in joining st, 18 sc, 4 dc dec, 19 sc, join. (42)

Rd 10: Ch 1, sc in joining st, 16 sc, sc dec, 4 sc, sc dec, 17 sc, join (40)

Finish off and weave in all ends.

Strap for Right Shoe:
(with white yarn)

Row 1: Count 30 stitches from where you just finished off, join with sc (to work backwards toward the heel), 21 sc. Ch 19, turn. (22 sc and 19 ch)

Row 2: Skip first st, sc 18 down chain and then 22 sc around shoe. (40)

Row 3: Ch 1, turn; 32 sc, ch 2, skip 2 st, 2 sc, ch 2, skip 2 st, 2 sc (button holes made). (40)

Row 4: Ch 1, turn; 40 sc.

Finish off and weave in all ends.

Strap for Left Shoe:
(with white yarn)

Row 1: Count 11 stitches from where you just finished off, join with sc (to work backwards toward the heel), 21 sc. Ch 19, turn. (22 sc and 19 ch)

Rows 2-4: Work the same as for the strap for the right shoe.

Hand sew shank buttons on with needle and thread. Cut pleather soles by tracing around the soles of the crocheted shoes. Hand sew pleather soles onto bottom of crocheted shoes using a needle and thread.


Frog face:
(with green yarn)

Rd 1: Ch 8, skip first 2 ch (counts as first hdc), 5 hdc, work 5 hdc in the last ch, 5 hdc, work 4 hdc in next ch, join to top of first hdc.

Rd 2: Ch 1, sc in joining st, 6 sc, 2 sc inc, 7 sc, 2 sc inc, join.

Eye #1:

Row 1: Ch 1, sc in joining st, sc, sl st. Do not finish off.

Row 2: Ch 1, turn; sl st, sc, sl st. Finish off.

Eye #2:

Row 1: Skip 2 st between eyes and join with sl st; sc, sl st.

Row 2: Ch 1, turn; sl st, sc, sl st.

Finish off leaving long tail to sew onto shoe (but not until after you have attached eyes and embroidered mouth). Weave in all other ends.

Frog eyes:
(with white yarn)

Magic circle 4 sc; join with sl st and leave long end for sewing to face.

***
At this point, you’re done with all the crocheting and just need to sew. Attach eyes to face. Embroider pupils onto eyes by just knotting black yarn a couple of times and threading the ends through to the other side. Alternatively, you could also sew on beads for the pupils. Embroider the smile (hopefully a little better than I did—I’m not the greatest at sewing mouths). Attach finished frog face to the front of the sandals and work in all the ends.


I hope that sweet little girl loves her froggy shoes!

Tutorial for personal use only, please.

Featured at: Free Crochet Patterns

Linking up to: Nap-Time Creations, And Sew We Craft, Mommy On Demand, The Stitchin' Mommy, The Craftberry Bush

Saturday, October 12, 2013

Neat Finish Window Pouch Tutorial


I have two weaknesses -- zipper pouches and clear vinyl.  Combine the two and I'm hard-pressed to pass up a chance to sew one.  My biggest complaint about all of the tutorials I have tried for window pouches so far is that they leave raw edges on the inside to some degree.  Designing a pouch with a clear vinyl window is tricky because you can't fully line it without blocking the window, thus negating the whole purpose!

I designed the size of this pouch to accommodate the car registration and insurance paperwork that we are required by law to carry around in the glove compartments of our cars.  Somehow, they always end up munched at the bottom of the compartment and are difficult to find when the need arises.  I have to credit Corey with the idea of sewing a window pouch to hold them, though I doubt he cares very much whether there are raw edges inside.  I wanted the pouch to have a little body to it so the paperwork would remain safe, so I grabbed a damaged canvas grocery bag, cut it apart, and came up with this:


Neat Finish Window Pouch -- Sewing Tutorial

Materials Needed:

Canvas (duck cloth, interfaced quilting cotton, or home décor weight fabric also work)
Lighter coordinating fabric (quilting cotton works great)
Clear Vinyl (any gauge)
Zipper (at least 8” long)
Coordinating thread
Denim or leather needle

Materials needed


Cutting instructions:

From the canvas, cut:
-       one piece 9” x 6 1/2"
-       six pieces 9” x 1 1/2"
-       four pieces 2 1/2” x 4”
-       two pieces, 4” x 1”

From the coordinating fabric, cut:
-       one piece 9” x 6 1/2"

From the clear vinyl, cut:
-       one piece 5” x 4”

Seam allowances will vary throughout the project, and will be indicated at the appropriate times.  You won’t need a Teflon foot or walking foot to deal with the vinyl, because your presser foot never actually touches the vinyl in this project!

Finished size of the pouch: approximately 8" x 6"


STEP ONE:  Framing the vinyl

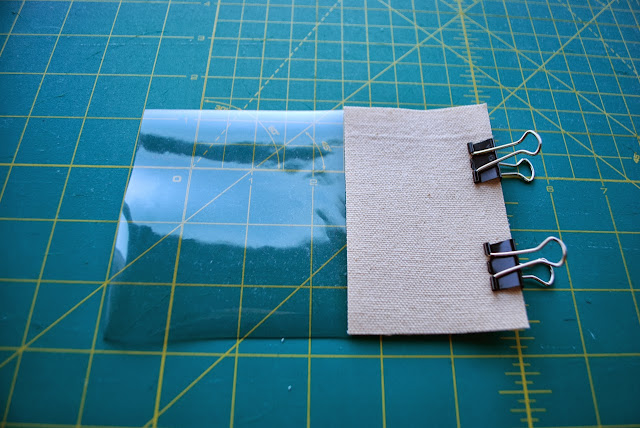
Sandwich two of the 2 1/2" x 4” pieces of canvas around the short end of the vinyl, lining up the raw edges with the edge of the vinyl and with the right sides of the canvas facing the vinyl.  [Do not use pins – use binder clips or Wonder Clips instead or else you will end up with holes in your vinyl.]  

Step one: framing the vinyl


Sew with a 1/2" seam allowance.  Finger press the seam open.

Step one: framing the vinyl


Repeat on the other size of the clear vinyl.

Step one: framing the vinyl


Sandwich two of the 9” x 1 1/2” pieces of canvas along the long edge of the vinyl, lining up the raw edges of the canvas with the edge of the vinyl and with the right sides of the canvas facing in to the vinyl.

Step one: framing the vinyl


Sew with a 1/2" seam allowance.  Finger press the seam open along the vinyl, and use an iron to press the seam open where only fabric is sewn to fabric.  Don’t melt that vinyl!  

Step one: framing the vinyl


Repeat along the opposite edge.  Now the vinyl window is nicely framed.

Next, topstitch all around the edge of the fabric, right outside the vinyl.  I find that I need to tighten my upper tension a bit when sewing through vinyl and heavier fabrics.  It didn’t matter so much in the previous steps, but topstitching on the vinyl (and later for topstitching the canvas with the zipper) causes my machine to need this adjustment for some reason.  

Step one: framing the vinyl


Set this cute little framed window aside until the end of the next step.

Step one: framing the vinyl


STEP TWO:  Sewing in the zipper

Lay out your zipper and mark two places 6 1/2" apart from each other.  (I always keep long zippers on hand so I will have one long enough for whatever project I sew, so that’s why I’m using a 14” zipper.)  It doesn’t matter at this point where you mark the zipper in relation to the zipper pull, but just make sure neither of the marks are outside either side of the zipper stoppers.

Step two: sewing in the zipper


Take one of your 4” x 1” pieces and lay it with the right side facing the right side of the zipper with 1/4" of the fabric overlapping the mark you made at the end of the zipper (not the side with the zipper pull when the zipper is closed).  The fabric should be aligned with the zipper, but I pulled it down out of place to show where it is in relation to the mark.

Step two: sewing in the zipper


Sew the fabric to the zipper at the mark (with a 1/4" seam allowance from the end of the fabric piece).  

Step two: sewing in the zipper


Trim the zipper that extends past the material.

Step two: sewing in the zipper


Open up the seam and finger press (or very carefully press with an iron, being careful not to melt the zipper!) the fabric away from the zipper.

Step two: sewing in the zipper


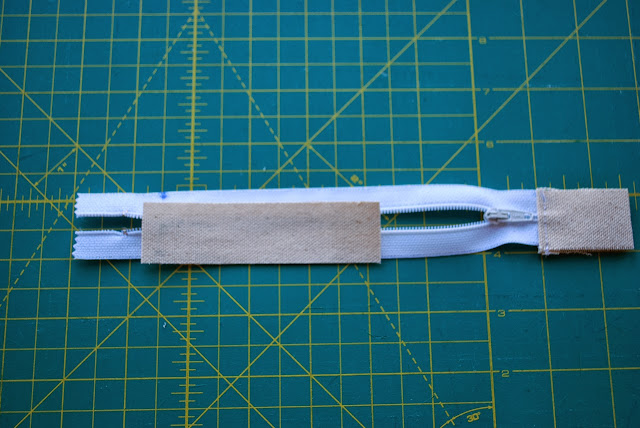
Flip the zipper over and fold the fabric piece over to meet up with the its other end, tucking 1/4" of the fabric toward the wrong side to hide the raw edge.  Finger press (or carefully press with an iron) it all flat.  

Step two: sewing in the zipper


Flip the zipper back over again and topstitch the little fabric sandwich you have made at the edge of the fabric.

Step two: sewing in the zipper


Repeat the process with the other side, but first unzip the zipper so that the zipper pull is between the two marks. 

Step two: sewing in the zipper

Step two: sewing in the zipper


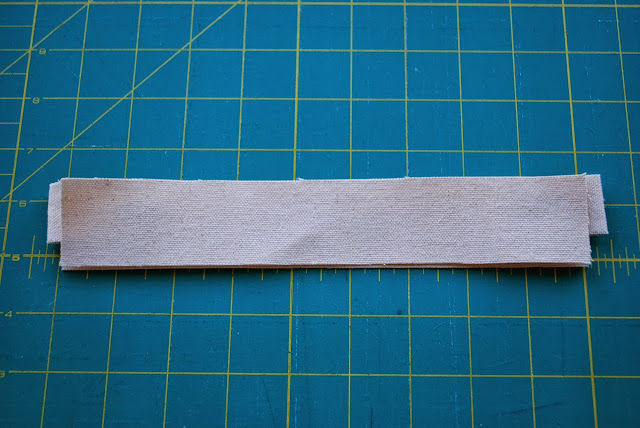
Take the last two unused 9” x 1 1/2" strips of canvas and sandwich the zipper between them (right sides of the strips facing inward), lining up the edge of the zipper tape with the raw edges of the canvas strips.  The fabric ends of the zipper will be longer than the canvas strips, so just center the zipper so that equal bits of the fabric ends stick out on each side. 

Step two: sewing in the zipper


Using a zipper foot (or if you’re lazy like me, just change the needle position to all the way over to the left), sew the sandwich all together.  It’s a little tricky because you can’t feel the zipper at the beginning where the fabric tabs are, so just sew with about a 1/4" seam allowance until the zipper begins.  Carefully press the seam open with the iron, and then topstitch at the edge of the fabric along the zipper.

Step two: sewing in the zipper

Step two: sewing in the zipper


Now this next step really bugs me, but there doesn’t seem to be any good way around avoiding sewing in the bottom side of the zipper this way.  To me, this is a completely bass-ackward way to insert a zipper, though I have seen tutorials that teach zipper installation this way.  First, you need to take your framed window and decide which way is up. 

Pull apart the top layers and trim the seam allowance inside down as far as you easily can.  This pic was taken before I had trimmed.

Step two: sewing in the zipper


Now carefully fold in both sides 1/4" and press them down.  

Step two: sewing in the zipper


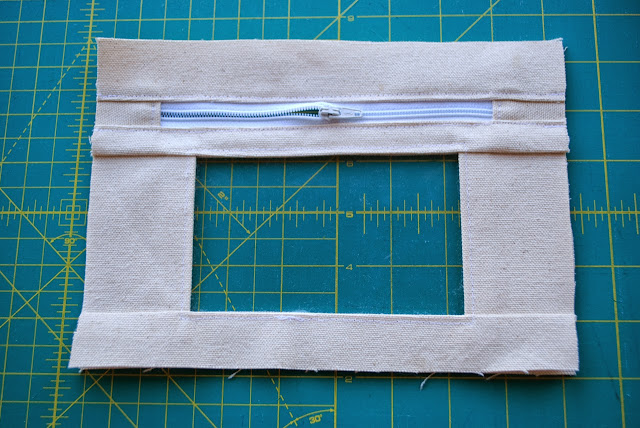
It should look like this now:

Step two: sewing in the zipper


Now take your piece with the zipper and nestle the bottom of the zipper (the side not already sewn in between the canvas strips) between the folded-in edges of the window piece.  Try your best to get the edge of the folds lined up the same distance away from the zipper as the top is.  

Step two: sewing in the zipper


Now either temporarily tape the zipper in place or use some big binder clips to help you keep everything from shifting.  Sew the zipper in by topstitching it into place near the edge like you did when you topstitched the other side of the zipper.  It’s an ugly process and just doesn’t feel as neat and secure as the proper method does, but it does the trick. 

Step two: sewing in the zipper


Square off your window/zipper piece and cut off those pesky zipper ends that are still sticking out.

Step two: sewing in the zipper


STEP THREE: Assembling the pouch

Remember those other two 9” x 6 1/2" pieces you cut?  We’re finally going to use them!  First things first – lay one of them down on the table and place the window/zipper piece on top.  Is the window/zipper piece the same size?  Chances are, unless you’re a robot or are really good with consistent seam allowances, it will be off by a little.  Trim whichever one is bigger down to the size of the other.  If your 9” x 6 1/2" piece needed to be trimmed a little, make the same trim with the other 9” x 6 1/2" piece too.

Now lay down the 9” x 6 1/2" piece that you want showing on the outside of the pouch (the canvas one) on the table with the RIGHT SIDE UP. 

Then, lay down the window/zipper piece with the RIGHT SIDE DOWN on top of the canvas piece.  The right side is the side with the zipper pull sticking up.

Finally, lay the 9” x 6 1/2” piece of lining (the piece that you want to peek out through the window) on top of the other two pieces with the RIGHT SIDE DOWN.  Now you have your pouch sandwich all ready for final assembly.

Step three: assembling the pouch


You’re going to sew all the way around the pouch with a 1/3” seam allowance.  [That’s an odd size, I know, but it’s the width of my presser foot with the needle in the middle and it works for me.  You could totally sew with a 1/2” seam allowance if you prefer.]  BUT FIRST, you have to try this cool trick that I just learned and then completely forgot its source.  When I rediscover the genius to whom I need to give proper credit for this trick, I will give credit where credit it due!

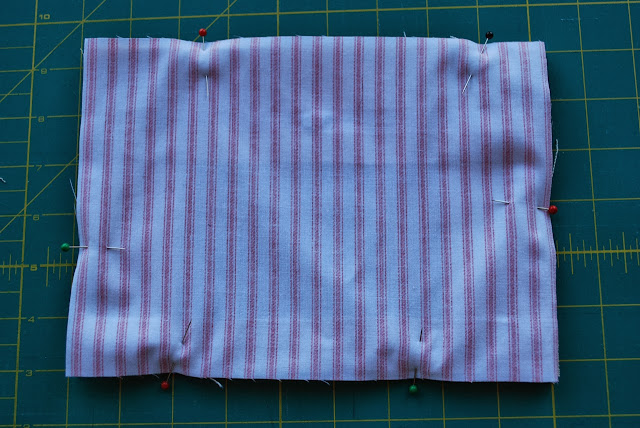
At the bottom of the pouch (the edge opposite the one the zipper is closest to), find a spot two inches or so in from the corner.  From the very edge of the fabric, sew a few stitches perpendicular to the way your seam will run, just until you reach your seam line.  Then, leave the needle down in the fabric, lift up your presser foot, turn the work ninety degrees, and then start sewing your seam all the way around the edge of the pouch until you turn the corner onto the last side (the one you started on).  Only sew in a couple of inches (leaving open about a 5” space unsewn for turning the work right side out – kind of a big gap, but necessary because of the stiffness of the vinyl), then leave the needle down in the work, lift the presser foot, turn the work ninety degrees again, and sew to the edge of the piece. 

Step three: assembling the pouch

Step three: assembling the pouch


This encourages your seam allowance turn in after you turn the project right side out, and it helps somewhat to prevent the fabric from stretching due to the stress of inverting the pouch (aka “birthing the bag”, a phrase which totally cracks me up).  If the photos don’t help and you’re still confused, just ignore the previous couple of paragraphs and sew around the pouch with a 1/2" or 1/3" seam allowance, leaving unsewn a 5” space for turning.

Step three: assembling the pouch


STEP FOUR: Birthing the pouch and finishing up

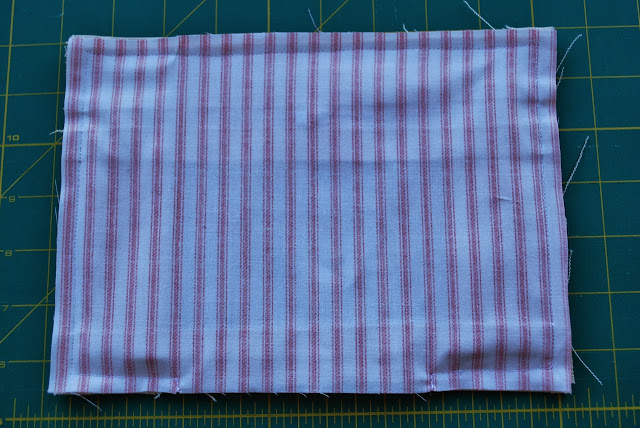
After sewing the pouch together, trim the corners really well to get rid of bulk.  

Step four: birthing the pouch and finishing up


At the space left for turning, separate the layers between the window/zipper piece and the outside back canvas piece and turn it right side out.  Be careful not to munch up the vinyl too much.  The corners are difficult to poke out, but just do the best you can.  You can unzip the zipper now to peek inside and see that there are NO EXPOSED SEAMS!  Woo hoo!  Too bad you now have that annoying opening to close.  I know I didn't get the corners poked out very sharp, but the bulk of the canvas made that impossible. 

Step four: birthing the pouch and finishing up


I hate hand sewing.  HATE IT.  If I thought there was any pretty way to use a sewing machine to do the next step, I would totally have done it that way.  Unfortunately, I think the only good way to close up this gap is hand-sewing it closed with a ladder (aka blind) stitch.  It would be really unfortunate to go to such lengths to eliminate raw seams on the inside of the bag just to leave an ugly spot of whip stitching on the outside of the bag, right?  Here is a great tutorial on using a ladder stitch to close a gap.  Just make sure that the raw edges are going inside between the lining and the back outside canvas piece.  It's also important to make sure you are catching all of the internal layers, including the lining, or else there will be a hole left open inside the pouch.  Not that I accidentally did that the first time or anything.  Ahem.

This is what it looked like before I sewed it.  I forgot to take a close-up photo of it all sewed up nice and neat.

Step four: birthing the pouch and finishing up


All done!  Now stick in all the car registration and insurance paperwork and keep it safely inside the glove compartment.

finished pouch


Or take it outside and take pretty pictures of it among the fallen leaves.  I know I pulled in the turning gap a little too far when I was hand-sewing it closed, but just pretend you don't see that part.

Finished pouch


I love the back!  I'm so glad I found a good use for this old bag.  Fun fact -- my friend, Ivette, met her husband, Jon, at that brewery.

Back of finished pouch