I have two weaknesses -- zipper pouches and clear vinyl. Combine the two and I'm hard-pressed to pass up a chance to sew one. My biggest complaint about all of the tutorials I have tried for window pouches so far is that they leave raw edges on the inside to some degree. Designing a pouch with a clear vinyl window is tricky because you can't fully line it without blocking the window, thus negating the whole purpose!
I designed the size of this pouch to accommodate the car registration and insurance paperwork that we are required by law to carry around in the glove compartments of our cars. Somehow, they always end up munched at the bottom of the compartment and are difficult to find when the need arises. I have to credit Corey with the idea of sewing a window pouch to hold them, though I doubt he cares very much whether there are raw edges inside. I wanted the pouch to have a little body to it so the paperwork would remain safe, so I grabbed a damaged canvas grocery bag, cut it apart, and came up with this:
Neat Finish Window Pouch -- Sewing Tutorial
Materials Needed:
Canvas (duck cloth, interfaced quilting cotton, or home
décor weight fabric also work)
Lighter coordinating fabric (quilting cotton works great)
Clear Vinyl (any gauge)
Zipper (at least 8” long)
Coordinating thread
Denim or leather needle
Cutting instructions:
From the canvas, cut:
- one
piece 9” x 6 1/2"
- six
pieces 9” x 1 1/2"
- four
pieces 2 1/2” x 4”
- two
pieces, 4” x 1”
From the coordinating fabric, cut:
- one
piece 9” x 6 1/2"
From the clear vinyl, cut:
- one
piece 5” x 4”
Seam allowances will vary throughout the project, and will
be indicated at the appropriate times.
You won’t need a Teflon foot or walking foot to deal with the vinyl,
because your presser foot never actually touches the vinyl in this project!
Finished size of the pouch: approximately 8" x 6"
STEP ONE: Framing the vinyl
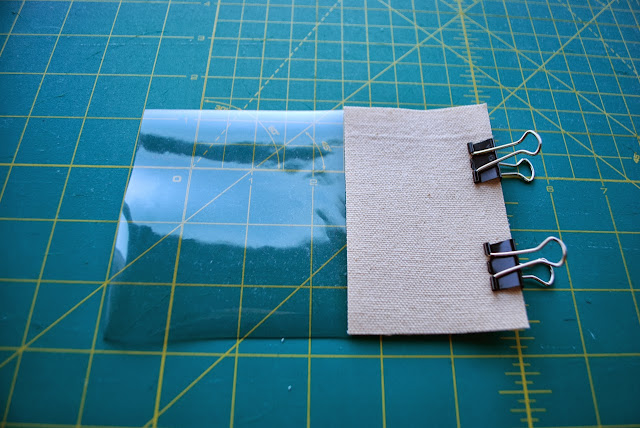
Sandwich two of the 2 1/2" x 4” pieces of canvas around the short end of the vinyl, lining up the raw edges with the edge of the vinyl and with the right sides of the canvas facing the vinyl. [Do not use pins – use binder clips or Wonder Clips instead or else you will end up with holes in your vinyl.]
Sew with a 1/2" seam allowance. Finger press the seam open.
Repeat on the other size of the clear vinyl.
Sandwich two of the 9” x 1 1/2” pieces of canvas along the long edge of the vinyl, lining up the raw edges of the canvas with the edge of the vinyl and with the right sides of the canvas facing in to the vinyl.
Sew with a 1/2" seam allowance. Finger press the seam open along the vinyl, and use an iron to press the seam open where only fabric is sewn to fabric. Don’t melt that vinyl!
Repeat along the opposite edge. Now the vinyl window is nicely framed.
Next, topstitch all around the edge of the fabric, right outside the vinyl. I find that I need to tighten my upper tension a bit when sewing through vinyl and heavier fabrics. It didn’t matter so much in the previous steps, but topstitching on the vinyl (and later for topstitching the canvas with the zipper) causes my machine to need this adjustment for some reason.
Set this cute little framed window aside until the end of the next step.
STEP TWO: Sewing in the zipper
Lay out your zipper and mark two places 6 1/2" apart from each other. (I always keep long zippers on hand so I will have one long enough for whatever project I sew, so that’s why I’m using a 14” zipper.) It doesn’t matter at this point where you mark the zipper in relation to the zipper pull, but just make sure neither of the marks are outside either side of the zipper stoppers.
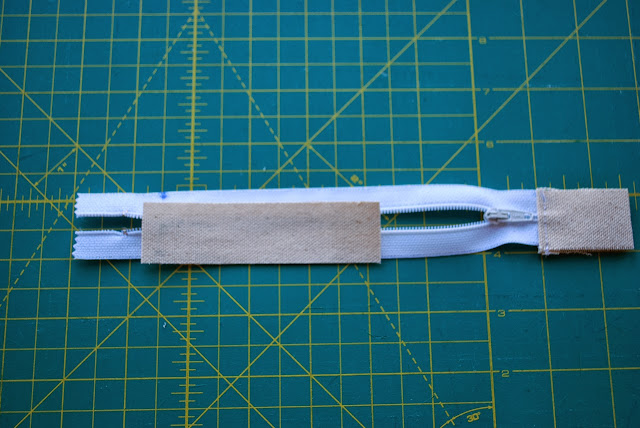
Take one of your 4” x 1” pieces and lay it with the right side facing the right side of the zipper with 1/4" of the fabric overlapping the mark you made at the end of the zipper (not the side with the zipper pull when the zipper is closed). The fabric should be aligned with the zipper, but I pulled it down out of place to show where it is in relation to the mark.
Sew the fabric to the zipper at the mark (with a 1/4" seam allowance from the end of the fabric piece).
Trim the zipper that extends past the material.
Open up the seam and finger press (or very carefully press with an iron, being careful not to melt the zipper!) the fabric away from the zipper.
Flip the zipper over and fold the fabric piece over to meet up with the its other end, tucking 1/4" of the fabric toward the wrong side to hide the raw edge. Finger press (or carefully press with an iron) it all flat.
Flip the zipper back over again and topstitch the little fabric sandwich you have made at the edge of the fabric.
Repeat the process with the other side, but first unzip the zipper so that the zipper pull is between the two marks.
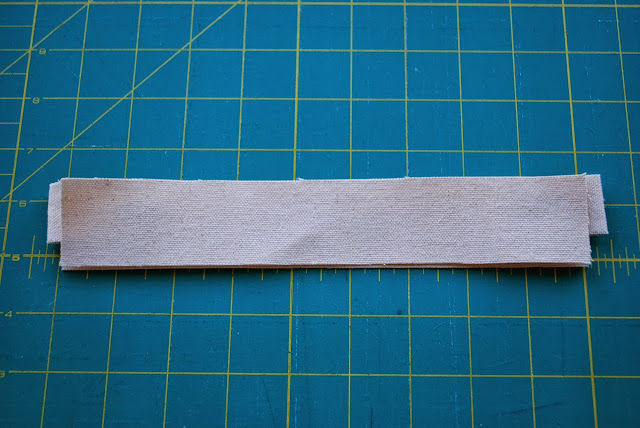
Take the last two unused 9” x 1 1/2" strips of canvas and sandwich the zipper between them (right sides of the strips facing inward), lining up the edge of the zipper tape with the raw edges of the canvas strips. The fabric ends of the zipper will be longer than the canvas strips, so just center the zipper so that equal bits of the fabric ends stick out on each side.
Using a zipper foot (or if you’re lazy like me, just change the needle position to all the way over to the left), sew the sandwich all together. It’s a little tricky because you can’t feel the zipper at the beginning where the fabric tabs are, so just sew with about a 1/4" seam allowance until the zipper begins. Carefully press the seam open with the iron, and then topstitch at the edge of the fabric along the zipper.
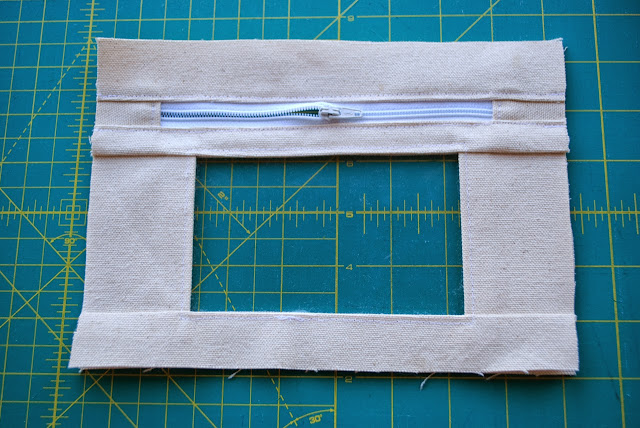
Now this next step really bugs me, but there doesn’t seem to be any good way around avoiding sewing in the bottom side of the zipper this way. To me, this is a completely bass-ackward way to insert a zipper, though I have seen tutorials that teach zipper installation this way. First, you need to take your framed window and decide which way is up.
Pull apart the top layers and trim the seam allowance inside down as far as you easily can. This pic was taken before I had trimmed.
Now take your piece with the zipper and nestle the bottom of the zipper (the side not already sewn in between the canvas strips) between the folded-in edges of the window piece. Try your best to get the edge of the folds lined up the same distance away from the zipper as the top is.
Now either temporarily tape the zipper in place or use some big binder clips to help you keep everything from shifting. Sew the zipper in by topstitching it into place near the edge like you did when you topstitched the other side of the zipper. It’s an ugly process and just doesn’t feel as neat and secure as the proper method does, but it does the trick.
Square off your window/zipper piece and cut off those pesky zipper ends that are still sticking out.
STEP THREE: Assembling the pouch
Remember those other two 9” x 6 1/2" pieces you cut? We’re finally going to use them! First things first – lay one of them down on the table and place the window/zipper piece on top. Is the window/zipper piece the same size? Chances are, unless you’re a robot or are really good with consistent seam allowances, it will be off by a little. Trim whichever one is bigger down to the size of the other. If your 9” x 6 1/2" piece needed to be trimmed a little, make the same trim with the other 9” x 6 1/2" piece too.
Now lay down the 9” x 6 1/2" piece that you want showing on the outside of the pouch (the canvas one) on the table with the RIGHT SIDE UP.
Then, lay down the window/zipper piece with the RIGHT SIDE DOWN on top of the canvas piece. The right side is the side with the zipper pull sticking up.
Finally, lay the 9” x 6 1/2” piece of lining (the piece that you want to peek out through the window) on top of the other two pieces with the RIGHT SIDE DOWN. Now you have your pouch sandwich all ready for final assembly.
You’re going to sew all the way around the pouch with a 1/3” seam allowance. [That’s an odd size, I know, but it’s the width of my presser foot with the needle in the middle and it works for me. You could totally sew with a 1/2” seam allowance if you prefer.] BUT FIRST, you have to try this cool trick that I just learned and then completely forgot its source. When I rediscover the genius to whom I need to give proper credit for this trick, I will give credit where credit it due!
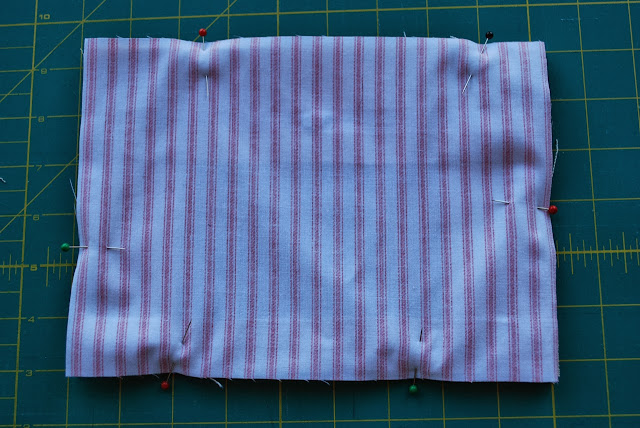
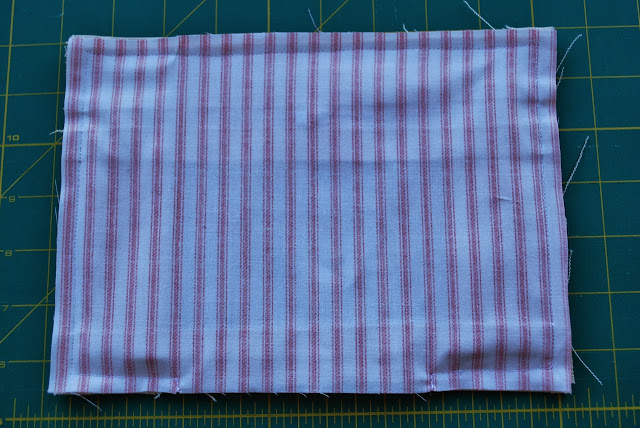
At the bottom of the pouch (the edge opposite the one the zipper is closest to), find a spot two inches or so in from the corner. From the very edge of the fabric, sew a few stitches perpendicular to the way your seam will run, just until you reach your seam line. Then, leave the needle down in the fabric, lift up your presser foot, turn the work ninety degrees, and then start sewing your seam all the way around the edge of the pouch until you turn the corner onto the last side (the one you started on). Only sew in a couple of inches (leaving open about a 5” space unsewn for turning the work right side out – kind of a big gap, but necessary because of the stiffness of the vinyl), then leave the needle down in the work, lift the presser foot, turn the work ninety degrees again, and sew to the edge of the piece.
This encourages your seam allowance turn in after you turn the project right side out, and it helps somewhat to prevent the fabric from stretching due to the stress of inverting the pouch (aka “birthing the bag”, a phrase which totally cracks me up). If the photos don’t help and you’re still confused, just ignore the previous couple of paragraphs and sew around the pouch with a 1/2" or 1/3" seam allowance, leaving unsewn a 5” space for turning.
STEP FOUR: Birthing the pouch and finishing up
After sewing the pouch together, trim the corners really well to get rid of bulk.
At the space left for turning, separate the layers between the window/zipper piece and the outside back canvas piece and turn it right side out. Be careful not to munch up the vinyl too much. The corners are difficult to poke out, but just do the best you can. You can unzip the zipper now to peek inside and see that there are NO EXPOSED SEAMS! Woo hoo! Too bad you now have that annoying opening to close. I know I didn't get the corners poked out very sharp, but the bulk of the canvas made that impossible.
I hate hand sewing. HATE IT. If I thought there was any pretty way to use a sewing machine to do the next step, I would totally have done it that way. Unfortunately, I think the only good way to close up this gap is hand-sewing it closed with a ladder (aka blind) stitch. It would be really unfortunate to go to such lengths to eliminate raw seams on the inside of the bag just to leave an ugly spot of whip stitching on the outside of the bag, right? Here is a great tutorial on using a ladder stitch to close a gap. Just make sure that the raw edges are going inside between the lining and the back outside canvas piece. It's also important to make sure you are catching all of the internal layers, including the lining, or else there will be a hole left open inside the pouch. Not that I accidentally did that the first time or anything. Ahem.
This is what it looked like before I sewed it. I forgot to take a close-up photo of it all sewed up nice and neat.
All done! Now stick in all the car registration and insurance paperwork and keep it safely inside the glove compartment.
Or take it outside and take pretty pictures of it among the fallen leaves. I know I pulled in the turning gap a little too far when I was hand-sewing it closed, but just pretend you don't see that part.
I love the back! I'm so glad I found a good use for this old bag. Fun fact -- my friend, Ivette, met her husband, Jon, at that brewery.
Tutorial for personal use only, please.
Featured on: Craft Gossip, Sewistry, Sewlicious Home Decor, Threading My Way
Linking up to: Creating My Way to Success, Sew Can She, U.S.S. Crafty, Flamingo Toes, Sew Many Ways, Scattered Thoughts of a Crafty Mom, Sumo's Sweet Stuff, Go To Sew, Sew Can Do, Skip to My Lou, ChrisW Designs, Nap-Time Creations, And Sew We Craft, Feather's Flights, Funky Polkadot Giraffe, Sugar Bee Crafts, Mommy On Demand, D.I.Y. Dreamer, Ginger Snap Crafts, Sugar and Dots, Fine Craft Guild, The Newlywed Pilgrimage, A Creative Princess, Lamberts Lately, A Jennuine Life, Gingerly Made, Life After Laundry, Sew Crafty Angel, The Stitchin' Mommy, The Craftberry Bush, Nap Time Crafters, I (Heart) Naptime, Sewlicious Home Decor











I love this pattern.... I use the one you made for me (though it was a slightly different pattern, it's the same idea) as a gum holder in my purse. Sonia loves being able to see the gum inside when I hand it back to her in the car.
ReplyDeletegreat tutuorial! thanks for sharing
ReplyDeleteHi, I like your idea, and have been working on similar bag. http://sew-much-better.blogspot.com.au/ if you want to have a look. I haven't been able to cover the edge of the plastic inside but have been lining the bag. I will try to put something online to show how.
ReplyDeleteThis is such a cool pouch Niki - with once again wonderfully clear instructions!
ReplyDeleteThanks for linking to a Round Tuit!
Hope you have a fabulous week!
Jill @ Creating my way to Success
http://www.jembellish.blogspot.com/
This is a great sewing tutorial...you make it look so easy! This would be a great post to link up to Create It Thursday #24…it's live now! Hope to see you there!
ReplyDeleteLovely pouch! Thanks so much for sharing the great tutorial! Would love to have you visit my blog sometime.
ReplyDeleteHave a fabulous weekend!
Hugs and love from Portugal,
Ana Love Craft
www.lovecraft2012.blogspot.com
Wow...your step-by-step photos and instructions are amazing, Niki! I know nothing about sewing, but as good as your directions are, I bet that even I could figure out how to make this cute little pouch!
ReplyDeleteThanks so much for linking up over at Moonlight & Mason Jars this! I had fun guest hosting this week, and I've enjoyed checking out all of the great links. Hope you have a wonderful weekend!
WOW these instructions are amazing! I would love to make a fun bag like this! I've never tried clear vinyl, but you make it look so easy!
ReplyDeleteWhat an awesome pouch! I love how you used vinyl so you can see inside the pouch. I can't wait to make one. You made a great tutorial! I'm so glad you linked up at Sewlicious Home Decor!
ReplyDeleteHave a great week!
Marti
You did such a great job on this!! Thanks for linking to Less Laundry, More Linking Party!
ReplyDeleteI can see lots of uses for a pouch with a clear front. As always, a fabulous tutorial!!!
ReplyDeleteNice project,
ReplyDeleteI sewed this pouch using someone else's tutorial and it had a binding. what a PITA! I hate binding. Anyway, I love the blunt way you write!! I hate hand sewing too!!! The zipper really does work that way, no matter how assbackward, so as long as it works and is easy, I'm game! ;)
ReplyDeleteKeep up with the good tutorials!!
Are the seams in side hidden? Is this because they are hidden by the liner piece? I picture of the inside would be great to help visualize it.
ReplyDelete